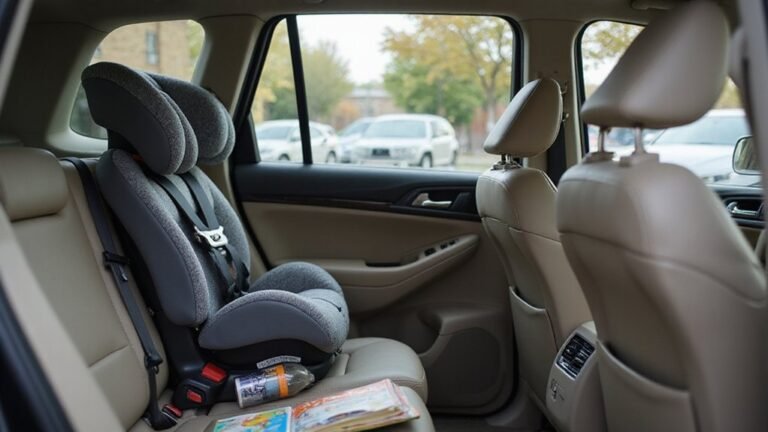
Wondering how to clean your car seat cover without damaging it? Whether it’s fabric, leather, or a synthetic blend, knowing the right method can keep it looking fresh and safe for your little ones.
From simple spot-cleaning tips to full washing instructions, you’ll find all the details you need below.
Check the Label and Material Before You Start
Check the label and material before you start. First, identify if your cover is fabric, synthetic blend, or foam-backed, as each type has different care limits. Many covers require air drying only, so avoid machine drying unless specified. Strong chemicals like bleach can damage heat-sensitive materials, so always steer clear of them. For example, the process of refinishing a chest of drawers also demands careful material identification to prevent damage. Always follow the instructions on the label above general habits; some covers may tolerate only gentle, low-temperature handling. If no label exists, consult your user guide or manufacturer’s recommendations before proceeding. For infant safety, picking a model that offers easy-to-clean materials is a key factor in choosing the right high chair. Cotton sheet sets for cribs often require similar gentle washing and air drying to maintain safety and comfort. Proper material identification ensures you choose the right cleaning method and avoid accidental damage.
How to Remove the Cover Without Damaging Straps or Hooks
Locate every attachment point—hooks, clips, elastic loops, Velcro, and strap anchors—around the seat edge, underside, and back panel before you start pulling off the cover. Check under seams and near the shell for hidden fastening points. Remember to include the headrest and lower base in your inspection. Photograph the routing of straps and the positions of connectors before disconnecting anything to help during reassembly. Perform pre-use safety checks to ensure the seat structure remains undamaged during the removal process. For additional guidance, consult the top infant car seat reviews to see which models are easiest to clean.
Release fasteners in a controlled sequence to prevent damage. Carefully lift hooks away from their anchors and press clip tabs before pulling them out. Gradually peel Velcro strips from one side, taking your time. Loosen harness straps completely and detach them from the splitter plate, pulling straps through slots gently while keeping the plate steady to maintain orientation. Start removal from the bottom of the seat to reduce tension on the attachment points.
Start removing the cover from the top, rolling it down as you go to avoid snagging. Stop if you encounter tight spots and double-check for any remaining fasteners. Instead of forcing fabric around protrusions, work slowly and carefully. Keep removed parts organized in separate containers or small boxes to avoid confusion during reassembly. For a successful reassembly, reference a perfect fit guide to verify that the cover aligns correctly with the seat contours.
Hand-Wash vs. Machine-Wash: Which Is Right for Your Cover?
Hand-wash covers made of neoprene, leather, faux leather, or foam-backed materials are your best bet for safety. You should avoid exposing these materials to heat above 40°C (104°F), as higher temperatures can cause damage. Hand-washing allows you to control agitation, reducing the risk of distortion or delamination. This method is also gentler on delicate fabrics that tend to shrink or fade with aggressive cleaning. For many parents, using a dedicated electric steam sterilizer can simplify the process of sanitizing breast pump parts after washing. For regular cleaning of more durable covers, machine-washing offers a fast and convenient solution. Use a gentle cycle and cold water to stay within safe temperature ranges. Always air-dry your covers after washing to prevent heat damage from dryers. When choosing a cleaning method, prioritizing drawer depth and storage quality matters less than fabric care, but for organizing your cleaned items, a tall dresser with deep drawers can keep bulky linens neatly stored. Consult the care label and material specifications to ensure you choose the most suitable cleaning method. Prioritize material safety over speed when dealing with sensitive or high-end covers.
Hand-Wash Your Car Seat Cover Step by Step
If you’re dealing with delicate materials that can’t go in the washing machine, hand-washing your car seat cover gives you full control over the process. Begin by removing the cover from your seat and snapping photos of the attachment points to help with reinstallation. Shake off loose debris and dirt, then vacuum both sides thoroughly, paying close attention to the seams and crevices. For synthetic fabrics, fill a sink with lukewarm water—about 30°C (86°F)—and add a mild upholstery detergent. Avoid using bleach or harsh chemical cleaners, as they can weaken or damage the fibers. Always check convertible car seat reviews to confirm your specific model’s fabric is safe for hand-washing. Submerge the cover inside-out in the water and let it soak for 15 to 30 minutes. Gently agitate the fabric with your hands or a soft sponge, focusing on stained or soiled areas. Be gentle to prevent fiber damage. Rinse the cover thoroughly with clean, lukewarm water until all soap residue is gone. If stubborn stains remain, pre-treat those spots with a mild dish soap solution, testing on an inconspicuous area first to ensure no discoloration occurs. After washing, gently squeeze out excess water without wringing, and hang or lay flat to air-dry in a shaded area. Keep the cover away from direct sunlight to prevent fading. Never reinstall the cover until it is completely dry to avoid mold or mildew buildup. For models with 5-point harnesses, ensure the harness straps are not accidentally soaked, as wet webbing can compromise safety. When selecting a new car seat, you may also want to consider nursery furniture sets that coordinate with your baby’s room.
Machine-Wash Your Car Seat Cover Correctly
Yes, you can machine-wash your car seat cover without ruining it, but you must check the care label first. If it’s labeled as machine-washable, fully remove the cover and examine zippers, Velcro, and seams for signs of wear. Shake out any debris and pre-treat stains with a fabric-safe remover, avoiding harsh scrubbing that could damage the fabric’s durability. For baby gear like bottle warmers, following a regular descaling routine prevents mineral buildup that could affect performance.
Load only the car seat cover into the washing machine to prevent strain on seams. Use a gentle cycle with cold water, ideally at 30 °C or lower, and select a low spin speed to minimize stretching. Opt for a mild liquid detergent, and skip bleach or fabric softeners—they can harm colors and fabric integrity. Do not overload the machine; one cover set per load ensures proper cleaning. For fragile parts like zippers or Velcro, place them inside a mesh laundry bag for added protection. After washing, inspect the cover for any remaining residue before drying. Tumble drying is not recommended; instead, follow appropriate drying steps to preserve the cover’s quality. Applying a similar principle to durable fabric construction can help maintain the cover’s strength over time. A well-constructed chest of drawers with multiple drawers uses quality hardware for smooth operation and lasting durability.
The Best Way to Dry a Car Seat Cover Without Shrinking
Air-drying your car seat cover is the safest method to prevent shrinking. Lay it flat on a clean surface or a breathable drying rack to help it maintain its shape. Avoid direct sunlight, heaters, and radiators, as these can weaken the fabric and cause stiffness over time. To remove excess moisture, gently blot the cover with a towel instead of wringing or twisting it, which can distort seams and padding. Just as with a mini crib that prioritizes space efficiency, drying your cover flat preserves its intended fit and structure. For parents, choosing a supportive feeding chair ensures that meal times remain comfortable and convenient for both baby and caregiver.
Hanging the cover is acceptable if you support its weight evenly, but flat drying provides the best results. If your care label allows, you can use a low-heat tumble dryer for a brief cycle—keep the cycle short, check frequently, and avoid using high heat. Otherwise, stick to air-drying in shade or indirect light to prevent fabric damage. For best results, consider gentle drying methods similar to those used for delicate crib bedding to avoid shrinkage.
Make sure to flip the cover periodically so that both sides dry evenly. This prevents hidden dampness that could lead to mold growth. Wait until every layer is completely dry before handling or reinstalling the cover to avoid any residual moisture that might cause issues later.
How to Reattach the Cover After Cleaning
To reattach the cover after cleaning, follow these steps. Begin by ensuring the cover is completely dry. Then, recall every hook, loop, clip, slot, and strap path you disconnected, as reassembly is essentially the reverse of removal. Start with the largest sections, fitting the cover over the seat shell like a glove. Work from the top or headrest downward, keeping the fabric loose to prevent misrouting straps. Remember that the entire cover is a single piece, simplifying removal and washing. If you are also looking for a travel system, ensure that the car seat is compatible with your chosen stroller for seamless use. For a high chair, look for similar quality, performance, and value in the product reviews.
Next, focus on strap alignment. Thread harness straps through the correct slots from back to front, making sure they are untwisted. Reconnect T-connectors only after the orientation is correct. Secure Velcro flaps first, then pull elastic edges over molded lips. Snap plastic tabs back into their anchor points. While the timing for using a breast pump is important, car seat reassembly requires a completely dry cover to ensure safety and proper fit.
Tighten the cover evenly starting from the center outward to avoid bunching or slack. Verify that all openings expose the harness hardware properly, straps move freely, and there is no fabric bunching near buckle paths. Double-check that every hook removal point was re-engaged correctly. Finally, review all steps carefully against your seat’s instructions to ensure proper reattachment.
Spot-Clean Stains Without Damaging Safety Labels
To spot-clean stains without damaging safety labels, start by identifying your seat material—fabric, vinyl, or leather—as each requires different methods. Use a dry-first approach by vacuuming loose dirt from seams with a crevice tool. This step prevents grit from grinding in during cleaning, which can accelerate fabric aging.
Next, apply a small amount of cleaner onto a damp microfiber cloth—never saturate the fabric or material. Over-saturation can seep into padding and damage adhesive-backed safety labels. Gently blot the stain using circular motions; do not scrub hard, as this can spread the stain or damage the surface. For stubborn spots, repeat the cleaning process instead of increasing force. For fabric seats, a baking soda paste can be effective, while leather surfaces typically only need a damp microfiber cloth.
After cleaning, dry the area thoroughly with open windows to air out the seat. Avoid using high heat sources near safety labels, as excessive heat can loosen adhesives or cause discoloration. Following this method helps maintain your seat’s stain resistance while protecting safety labels and ensuring the labels remain visible and intact.