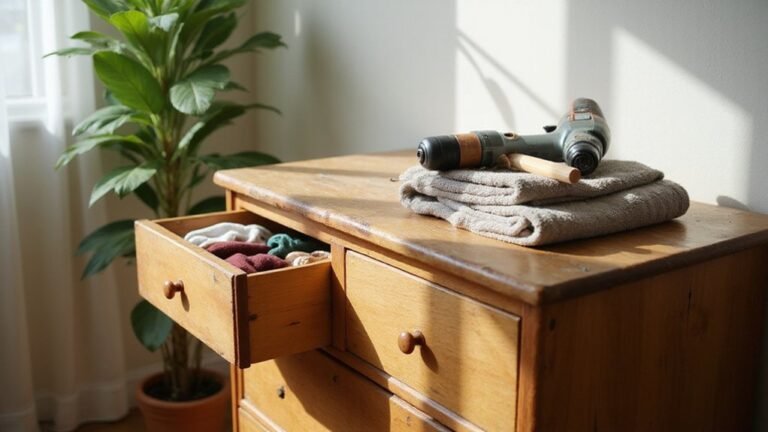
Ever wondered how to build a sturdy, stylish chest of drawers yourself? You’ll learn to measure your space, select the right size, and assemble everything from plywood carcasses to smooth-gliding drawers.
This simple project can transform your room and save you money. Keep reading for all the steps you need to create your own custom storage.
Plan Your Chest of Drawers’ Size and Drawer Count
To determine the overall size of your chest of drawers, start by measuring your wall’s width, height, and depth. Choose a width that occupies only 40–50% of the wall length to keep the room balanced and avoid overcrowding. For height, aim for 85–100 centimeters to ensure easy access to drawers without overwhelming the space. Depth should allow comfortable opening of drawers and clearance for front pulls, typically around 50–60 centimeters.
Consider the available wall area by measuring the full space, subtracting for doors and windows, then leave an additional 4–6 inches on each side for clearance. To ensure functionality, plan for at least 36 inches of clearance in front of the chest so drawers can open fully without obstruction. Use painter’s tape on the floor to mark the footprint and test the fit before finalizing your measurements. For households with young children, reviewing booster seats with five-point harness can help ensure safe seating during DIY projects. When traveling with infants, you may also want to consider Uber-friendly infant car seats for added safety and convenience on the go.
Material choices influence both durability and appearance. Plywood offers strength and provides a smooth surface suitable for painting, making it versatile and cost-effective. Solid wood delivers a classic, high-quality look but tends to be more expensive and heavier. Your decision should factor in aesthetics and budget, aiming for a design that complements your room and meets your daily needs. For a chest of drawers in a nursery, consider choosing a firm mattress support like the top rated crib mattresses that prioritize safety and durability.
Gather Plywood, Pocket Screws, and Drawer Slides
Use 3/4-inch plywood for the carcass, drawer boxes, and drawer fronts because it offers the necessary strength for a durable build. For lighter drawer construction, 1/2-inch plywood is a good alternative, providing enough support without excess weight. Drawer bottoms and backs should be made from 1/4-inch plywood to keep overall weight down while maintaining structural integrity. These thicknesses ensure consistency and strength across all components. When selecting a travel bag for a car seat, look for one with reinforced padding and straps to protect the hardware during transport. For a perfect fit, check car seat cover reviews that compare top options for durability. If you need to keep items cold during a long build, consider a cooler box for breast milk to safely store perishable snacks.
For hardware, you’ll need a pocket-hole jig set designed for 3/4-inch material. Use 1 1/4-inch pocket-hole screws for joining plywood panels and 2 1/2-inch screws when connecting framing or structural parts. Combining these with wood glue results in stronger, more durable joints.
When installing drawer slides, measure your cabinet openings accurately. Make each drawer box 1 inch narrower than the opening to allow for smooth sliding. Ensure consistent spacing between the slides to prevent binding, and apply paste wax to the drawer bottoms to reduce friction and facilitate easier movement.
Build the Chest of Drawers’ Carcass With Pocket Screws
Drill pocket holes on the inside faces of your stretchers, toe kick parts, and bottom panel. Use 1¼-inch coarse-thread pocket screws for ¾-inch plywood. Space the holes about 6 to 8 inches apart on the bottoms, starting at least an inch from the front edge. Ensure the bottom panel is positioned away from any side-impact risk zones by keeping it centered during clamping. Clamp the bottom panel in place before driving the screws. Next, add the stretchers, clamping them to prevent shifting before fastening. Check the diagonal measurements of the carcass to ensure it remains square, which will help your drawer hardware align correctly later. Consider the long-term durability of your joinery when choosing between a rechargeable or corded assembly approach. For added peace of mind, verify the carcass does not wobble like a newborn swing with an unstable base. Refrain from using glue unless you want extra strength, as pocket screws alone provide sturdy joinery and a clean look. For accuracy, cut back factory edges by 1/8” or 1/4” to clean up any damage before assembling the parts.
Fit Internal Rails and Dividers for Drawer Openings
Internal rail joinery should be strong and precise. Use sliding dovetails for tension resistance without glue, providing a secure fit that can be disassembled if needed. A stopped dado offers a clean, tight, and snug fit, ideal when you want a neat appearance. Mortise-and-tenon joints work well where dividers meet the side pieces, offering durability and stability. To ensure consistent depth across all joints, set your dado stack height and verify it with a test piece before cutting, locking the adjustment to prevent shifting. Just as you would monitor weight and height guidelines to know when a child outgrows a booster seat, check your measurements against your design specs to avoid oversized or undersized components. For a safe and sturdy result, always clamp the assembly securely before final fastening.
Before final assembly, dry-fit all components, keeping the fit slightly loose to allow for adjustments. Pre-drill and countersink screws to prevent splitting the wood. Clamp the assembly square and then fasten, ensuring everything stays aligned. Set your reveal sizes and opening heights before positioning any rails, as accurate drawer geometry depends on these measurements. Taking these steps ensures a solid, precise fit for your internal rails and dividers. Measure internal distances and add one inch for fitting gaps, then fine-tune each piece with a shoulder plane to clean any excess material for a smooth, hand-pressed fit.
Install Drawer Slides on the Carcass
Install the drawer slides on the carcass by first confirming their compatibility. Measure your cabinet opening width, depth, and the required slide length to ensure a proper fit. Use a consistent reference line or spacer block on both sides to maintain even slide heights, which helps keep your drawer spacing square. For high-capacity projects, choosing quality slides ensures long-term durability. For side-mount slides, align them carefully based on your front construction type. Overlay fronts should sit flush with the carcass, while inset fronts require a setback equal to the front’s thickness. Make sure to mount the slides level and parallel to the opening to allow smooth operation, and verify the distance from the slide to the case both front and back for parallel alignment. Always drill pilot holes before driving screws to prevent splitting the wood. Insert one screw at the front, one in the middle, and one at the back of each slide, following the slide’s slot pattern. Keep these screws slightly loose until you install the drawer members later, providing flexibility for final adjustments. When traveling with your completed project, a travel crib can help keep your little one safe and comfortable. Similarly, always prioritize rear-facing safety for children, as it significantly reduces the risk of head and neck injury during a crash.
Build the Chest of Drawers’ Drawer Boxes
When building the drawer boxes, start by cutting your side pieces from ¾-inch plywood to match the opening depth. Then, cut the front and back pieces slightly narrower than the overall drawer width to accommodate the thickness of the side panels and joinery. Consider various drawer joint types; pocket-hole screws are popular because they are fast and provide strong joints for plywood. Drill pocket holes in the front and back pieces before assembling the three sides. Cut a ¼-inch-wide dado about ½ inch from the bottom edge of the box to hold the bottom panel securely. Before attaching the final side, slide in the bottom panel through the dado, which helps keep the box square. If you’re exploring plywood alternatives, ½-inch plywood can work for lighter loads, but ¾-inch plywood offers better stiffness and durability. Keep the thickness consistent across all parts to ensure accurate joints. Always dry-fit everything first to catch any dimensional errors before final assembly. Use corner clamps during assembly to maintain proper angles and alignment. For a safer build, use sharp drill bits to prevent tear-out when drilling pocket holes. To ensure your baby sleeps safely, look for a firm and supportive mattress that fits snugly in the crib frame. For a sturdy crib rail cover, you would need to choose safe materials that are free from harmful chemicals and sharp edges.
Finish Your Chest of Drawers With Sanding and Trim
Once the drawer boxes are assembled, you can proceed with sanding and trimming to achieve a professional finish. Begin by removing the drawers and hardware, then thoroughly clean the entire piece. Work in a well-ventilated area with a drop cloth to catch dust and debris.
Start with an 80-grit sandpaper on a random-orbit sander for broad surfaces, which helps remove any roughness and prepares the surface. Progress to 120 grit to smooth out the initial scratches, then finish with 220 grit for a polished, ready-to-finish surface. Use a detail sander for corners and intricate trim to ensure thorough coverage. Sand carefully along the edges to preserve crisp, sharp lines; avoid round-over unless that look is desired. To confirm flatness and smoothness, check with a straightedge across flat areas. Avoid excessive heat from friction by choosing appropriate grit to prevent gum buildup on discs. For a truly comfortable and safe seating option for your child, consider the top high chairs for infants to ensure ergonomic support.
Between each grit, clean the surface thoroughly to remove dust and debris, which can mar the final finish. If your chest is already painted, scuff the surface with 220 grit sandpaper to create a good tooth for the new finish to adhere to. For parents on a limited budget, checking Medicaid breast pump coverage can help offset equipment costs.
Your finishing options depend on whether you want to highlight the natural wood grain or create a solid color. Once the surface feels smooth and even, you can apply primer if painting or staining. For a painted look, use a quality primer before applying your chosen paint. For staining, apply a wood conditioner first to ensure even absorption. If you prefer a protective layer, choose a suitable topcoat such as polyurethane or varnish. Always remove dust thoroughly between coats to achieve a professional, smooth appearance. When considering the longevity of a child’s sleeping furniture, it is helpful to compare mattress dimensions and lifespan to ensure your choices support long-term use.