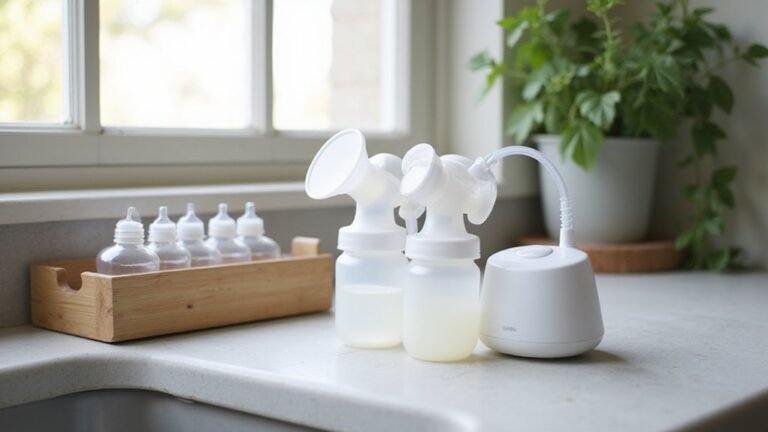
Wondering how often you should swap out your breast pump parts? The answer varies depending on which piece it is and how often you use it.
For heavy daily use, silicone valves, membranes, and duckbills usually need replacing every 2 to 4 weeks.
Meanwhile, backflow protectors can last 3 to 6 months.
Keep an eye out for signs like loss of suction or strange noises that tell you it’s time to change parts.
The rest of the guide walks you through what to check and when.
Breast Pump Part Replacement Guide: Do You Need That Schedule?
Silicone valves and duckbills should be replaced every 2 to 8 weeks if you pump regularly. Because these soft silicone parts lose elasticity quickly, regular pumping stresses the material, causing it to wear faster. As elasticity diminishes, suction weakens and your pump’s efficiency declines, making pumping sessions longer and less effective. Heavy pumping schedules lean toward the shorter end of this range, so don’t wait for visible damage. Instead, use this timeline as a maximum guideline and check the parts weekly for warping, discoloration, or looseness. If you notice any of these signs, replace them immediately. Prioritizing timely replacement over cost ensures your pump maintains optimal function, preventing frustration and ensuring maximum milk output. These parts are inexpensive compared to the impact on your pumping success and nipple comfort. For some mothers, direct breastfeeding provides simpler long-term maintenance since no pump parts need replacing. Replacing them proactively keeps your pump performing like new every session. For a similarly durable and well-fitting option, check out our best car seat cover reviews that prioritize longevity and performance. To extend the life of your new parts, proper cleaning and sterilization methods are essential for preventing bacterial buildup that can degrade silicone faster.
Valves, Membranes, and Duckbills: Swap Every 2–4 Weeks
If your pump is used regularly, you should swap your valves, membranes, and duckbills every 2 to 4 weeks, even if they still appear fine. These parts are subject to constant flexing, which causes silicone fatigue and reduces suction strength. Over time, they degrade invisibly, so don’t rely solely on their appearance. Cracks, tears, or a loose seal indicate it’s time for a replacement. For lighter use, you might extend this period to 1 to 3 months, but always consult the manufacturer’s instructions. Ignoring these replacements results in decreased suction power and lower milk output. Keep spare parts on hand and replace them according to this schedule to maintain optimal pump performance. Just as a breathable crib mattress promotes safe, comfortable airflow for your baby, regularly replacing pump parts ensures efficient, hygienic operation. The same principle applies to knowing the age limits for your baby’s sleep equipment to ensure safety at every stage. When selecting replacements, prioritize parts that fit snugly with your specific pump model, as a proper seal is as crucial as the changing table’s safety rails are for preventing infant falls during diaper changes.
Backflow Protectors and Diaphragms: Replace Every 3–6 Months
You should replace backflow protectors and diaphragms every 3 to 6 months, depending on your pumping frequency. If you pump more than three times daily, aim closer to the 3-month mark. Lighter use can extend the replacement interval to about 6 months. These parts are crucial because they protect your pump’s motor from moisture and help maintain proper suction. Over time, daily pumping causes the silicone to stretch and weaken the seal, making regular inspections essential. Look for signs like tears, warping, or condensation inside the tubing, which indicate it’s time for a replacement. A damaged diaphragm can let moisture seep where it shouldn’t, increasing the risk of mold development or motor damage. To prevent shifting and maintain proper alignment during use, a sturdy crib rail cover can serve as a safe model for how secure silicone components should fit. Regularly inspecting these components and replacing them on time keeps your pump functioning efficiently and ensures your milk remains safe. For added comfort during pumping, nipple creams can help soothe soreness and prevent cracking by creating a protective barrier. For parents who also use bottle warmers, following similar safety guidelines for cleaning and maintenance can further prevent contamination risks.
Flanges, Connectors, and Bottles: These Last 6 Months or More
Flanges, connectors, and bottles should be replaced sooner than the six months they are expected to last if you notice cracks, warping, or rough edges. Typically, you will need to replace them every 3 to 6 months, depending on how often you pump. Heavy pumping shortens this timeframe. Check these parts monthly for visible damage or discoloration, as both can degrade the aesthetics of your breast pump and indicate wear. Cracks can harbor bacteria, while warping can disrupt the fit, both compromising hygiene and suction. Replace any damaged parts immediately if you experience pain, a decrease in suction, or see residue that won’t wash away. Your comfort and keeping the pump hygienic should guide your replacement schedule more than a fixed timeline. Don’t let cloudy bottles or chipped flanges linger; swapping them out promptly keeps the suction strong and your milk safe. The same principle applies when selecting a lightweight car seat, where checking for cracks and sturdy construction is vital for newborn protection. Similar to how a cosco car seat requires regular inspection for cracks to ensure safety, worn pump parts can compromise your pump’s function and hygiene. For example, finding the perfect swing for your newborn involves comparing key features to ensure comfort and safety, just as you should compare pump parts for signs of wear.
Tubing Replacement: Why It’s Usually Not on a Schedule
You should replace tubing only when necessary due to health or fit issues, not on a fixed schedule. Moisture buildup inside tubing is a primary reason for replacement. Because you cannot fully dry or sterilize tubing without damaging its material, any presence of condensation, mold, or milk residue means it must be replaced immediately. Cleaning cannot eliminate contamination safely. For example, finding a fitted sheet that fits a Pack ’n Play properly is essential to prevent bunching and suffocation risks, just as ensuring a secure seal on your tubing is critical for pump performance. Fit problems are just as critical. When the tubing ends stretch or no longer create a secure seal, suction drops and pump efficiency decreases. A loose connection, even without visible damage, indicates it’s time to swap the tubing out. Cracks, warping, and internal debris are also clear triggers for replacement. Follow manufacturer guidance, but the general rule is to replace tubing whenever moisture, contamination, or fit issues occur. There’s no need for a set schedule—priority is given to ensuring safety and optimal performance. Since heat and airflow are key factors in keeping your pumping setup efficient, a stroller fan can help regulate temperature during travel, but it won’t solve tubing issues.
Breast Pump Replacement Timeline by Part Type
Valves, membranes, and duckbills typically need replacement every 2 to 4 weeks with frequent use. Soft parts tend to lose suction quickly, especially when subjected to heavy pumping sessions. For maximum longevity, consider protecting your pump equipment with a car seat protector to keep parts clean and organized during travel. To keep parts secure while on the go, you can follow reattachment safety checks similar to those used for car seat covers. Backflow protectors last longer and generally require replacement about every 3 months if you pump regularly. Flanges and connectors can often be used for up to 6 months if they are not damaged or worn. Your cleaning routine significantly influences these timelines; harsh scrubbing or improper drying can cause parts to degrade faster. Compatibility also matters, as aftermarket parts may not seal properly and could affect performance. To keep your pump functioning optimally, follow manufacturer recommendations for valves and membranes, and replace duckbills monthly if you pump more than four times daily. Regularly swapping these parts ensures effective suction and minimizes the risk of backup or contamination. Consider building dedicated drawer dividers to organize spare parts and tools, keeping them safe and sturdy for quick access.
When to Replace Parts Based on Wear, Not Time
Visible damage is the most reliable indicator that it’s time to replace pump parts. Because different parts wear at different rates depending on your pump model, pumping frequency, and suction settings, waiting for a fixed date isn’t effective. The first sign of wear is usually a loss of suction, which indicates that valves or membranes may have stretched or torn. Higher suction settings can speed up this wear, so inspect your pump more frequently if you pump at maximum. Similarly, investing in portable travel car seats can simplify your routine when you’re on the go with a baby.
Listen for changes in the pump noise; a different sound often signals a cracked diaphragm or warped seal. If cleaning methods like boiling have stiffened your silicone parts, replace them immediately rather than waiting. Worn duckbill valves will no longer sit flat, reducing performance. Always replace any parts that show cracks, cloudiness, or moisture because strong, consistent suction depends on well-maintained parts. For example, you could adapt this approach to checking infant car seat fit, where visual inspection of straps and buckles is also more reliable than relying on a fixed timeline.
In short, replacing parts promptly at the first signs of damage ensures optimal pump performance and effective breastfeeding support. Don’t rely on a calendar; use visual and functional cues to guide your replacement decisions.
Where to Buy Replacement Parts and How to Clean Them
You can purchase replacement parts for your breast pump from manufacturer websites, which offer exact components like valves, membranes, and flanges. These sites ensure compatibility with your specific model, which is crucial for proper function and comfort. You can also find compatible parts at durable medical equipment suppliers and online breastfeeding stores, which categorize accessories by pump brand to simplify selection. Always verify your pump’s model number and flange size before buying to ensure a proper fit and optimal milk removal.
To keep parts clean and functioning well, wash those that contact milk after each use with warm water and soap. Rinse thoroughly and allow them to air-dry on a clean surface—avoid wiping with cloth towels, as they can transfer germs. Refer to your pump’s instructions to check if any parts are dishwasher-safe, which can provide a more thorough cleaning.
If you notice persistent residue or mold inside tubing or other parts that aren’t responding to cleaning, it’s best to replace those components. Cleaning alone won’t eliminate built-up residue or mold, which can impact milk flow and hygiene. Regular inspection and timely replacement help maintain effective pumping and reduce the risk of contamination.