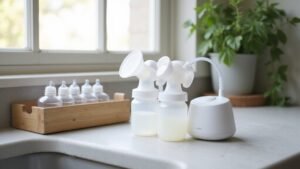
Cleaning your breast pump parts might seem like a hassle, but it’s essential to keep your equipment safe and free from germs.
You’ll want to disassemble each part, wash thoroughly, and sometimes sterilize to ensure they’re hygienic for every use.
By following simple steps—like rinsing immediately, scrubbing with a gentle soap, and air-drying—you can keep your pump parts clean and safe.
Keep reading for a clear, step-by-step guide to make the process easy and effective.
Start With Clean Hands and Disassembled Pump Parts
Start by washing your hands with soap and water for at least 20 seconds before cleaning any pump parts. This CDC-recommended step significantly reduces the transfer of germs to milk-contact surfaces. Proper hand hygiene is essential because it’s your first line of defense against contamination, so don’t skip it even if your hands look clean. Just as a car seat cover must fit perfectly to protect the seat, a perfect fit for cleaning routines ensures every milk-contact surface is thoroughly sanitized.
Next, prepare a dedicated workspace that stays spotless. Wipe down your counter and use a clean wash basin solely for infant feeding items. Have a separate bottle brush reserved only for pump parts to prevent cross-contamination. For organizing these supplies, consider a chest with multiple drawers to keep your cleaning tools separated and accessible. Avoid soaking parts in the sink, as drain germs can easily transfer to the components.
Follow a thorough disassembly routine by separating every milk-contact piece—flanges, valves, membranes, connectors, and collection bottles. During disassembly, check each part for residue or signs of wear, replacing anything damaged. Keep tubing out of routine washing; if condensation appears inside, run the pump briefly to dry it. Always clean parts shortly after pumping to prevent milk residue from hardening, making cleaning easier and more effective.
Rinse Milk Residue From Pump Parts
Rinsing milk residue from pump parts immediately after use is essential to prevent the milk from drying and becoming difficult to remove later. Use cool, running water at about 20 °C (68 °F) to loosen the residue without making it sticky, as warm water can. Hold each milk-contact part—such as breast shields, valves, and bottles—directly under the stream of water rather than in standing water. Focus on crevices and hard-to-reach areas where residue tends to collect. If stubborn spots remain, wipe them gently with a clean paper towel. Having a clean, dry surface nearby for placing parts is as important as choosing safe crib bedding for your baby’s sleep environment. This quick rinse minimizes the amount of residue that reaches the washing stage, making the overall cleaning process easier and more effective. For busy parents, using a compatible high chair to seat the baby safely can free up both hands during this step, which is similar to choosing the perfect fit high chair for infant feeding convenience.
Gather a Dedicated Basin, Brush, and Mild Soap
Gather a dedicated basin, brush, and mild soap before you start cleaning. The basin should be large enough to fully submerge the pump parts and keep it separate from your kitchen sink to avoid household germs. Use a brush reserved solely for infant feeding items; this helps reach hard-to-clean crevices and prevents cross-contamination. For a newborn, a bouncer seat often includes the best newborn supports for safety and comfort.
Choose a mild, fragrance-free dish soap to avoid irritating your baby’s skin or leaving harmful residues. After each cleaning session, rinse the basin and brush thoroughly with water and let them air-dry completely. Proper drying reduces moisture where bacteria and mold can develop. For thorough sanitation, you can also use one of the top electric steam sterilizers reviewed for breast pump parts. Store your cleaning tools in a clean, dry area away from food prep zones. For a changing pad, many covers are made from waterproof materials that protect against leaks.
Regularly inspect your brush and basin for cracks, stains, or odors. Replace them promptly when signs of wear appear to maintain a hygienic setup. Using dedicated tools and following these routine steps support breast pump hygiene and help keep microbial growth at bay.
Scrub Every Pump Part With Soap in a Clean Basin
After you’ve pumped, disassemble each milk-contact piece—such as bottles, valves, breast shields, and other small parts—and place them into a dedicated basin filled with hot, soapy water. Use mild dish soap; avoid antibacterial soaps since plain soap is just as effective for preventing illness. Scrub each part individually with a clean brush or washcloth designated for baby feeding items. Be gentle to remove milk film and residue from crevices and valves without damaging the parts. Proper flange fit is crucial for effective pumping, as the flange creates a seal between the breast and pump. Pay special attention to small, hard-to-reach areas, using a brush if the manufacturer allows. Only wash the milk-contact parts; leave tubing out unless specifically instructed to clean it. Rinse everything thoroughly under running water or in another basin to remove all soap residue, preparing the parts for drying. Just as choosing the perfect car seat requires careful comparison, thorough cleaning ensures pump parts stay safe and functional.
Rinse and Air-Dry Pump Parts Completely
After scrubbing every milk-contact part, rinse each piece immediately under clean, running water to remove any remaining suds or milk residue. Use a dedicated basin for rinsing instead of your sink to avoid cross-contamination and maintain breastfeeding hygiene. Rinse only the parts that touched milk, not the tubing or the exterior of the pump. To further protect your infant’s sensitive items, you might consider using breast pump storage bags or specialized drying covers similar to those reviewed for car seats. Unlike car seats, pump parts require frequent cleaning to ensure safety, so avoiding cross-contamination is crucial because it can introduce bacteria that cause illness, just as rear-facing orientation significantly reduces injury risk in crashes. The sterilization process is especially important for newborns or premature infants to prevent infections.
Place the rinsed parts on a clean towel or a drying rack. Allow them to air-dry completely before reassembling. Rubbing them dry with a dish towel can transfer germs, so avoid doing that. Ensuring the parts are fully dry helps prevent moisture-related contamination and keeps your pump safe for future use.
Do not wash the tubing; instead, if condensation appears inside, run the pump for a few extra minutes to evaporate the moisture. Finally, rinse your basin and brush after each use and let them air-dry to keep your cleaning tools hygienic.
Use the Dishwasher for Dishwasher-Safe Parts Only
Use the dishwasher only for dishwasher-safe parts. Before loading, confirm that your equipment parts are compatible with dishwasher cleaning by checking the manufacturer’s instructions or manual. Some parts are better washed by hand to avoid damage. For dishwasher-safe items, place them on the top rack inside a closed-top basket or a mesh bag to keep them secure.
Point bottles and shields downward so water can drain effectively, and keep all parts away from the heating element to prevent warping or melting. Use hot water combined with a heated drying cycle, such as a sanitize setting, to thoroughly clean and eliminate germs without a separate sanitizing step. Opt for fragrance-free detergent to prevent residue buildup. To further reduce germ transmission, it is important to store dried parts in a clean, covered container rather than leaving them exposed to the air.
After the wash cycle finishes, remove parts with clean hands and allow them to air-dry if any moisture remains. Do not use cloth towels to dry parts, as they can transfer germs. Keep in mind that frequent dishwasher cleaning may cause certain parts to wear faster over time, so always follow your equipment’s specific instructions. Always check the manufacturer’s instructions for your specific device to confirm the best cleaning methods and avoid damage. For additional storage guidance, consider reviewing a chest of drawers review for organizing your cleaned parts effectively.
Sanitize Pump Parts With Boiling or Steam
To sanitize pump parts effectively, boiling or steaming are common methods. Start by thoroughly washing all parts with soap and water. For boiling, fully disassemble the parts and submerge them in a large pot of water. Bring the water to a rolling boil and maintain it for five minutes, stirring occasionally to prevent scorching. After boiling, use clean tongs to remove the parts and let them air-dry on a clean towel. For steaming, place the disassembled parts in a microwave steam bag or use a steam sterilizer if your parts are compatible. Follow the manufacturer’s instructions precisely to ensure proper sterilization. Both methods kill germs left behind after washing and should be used at least once daily to maintain hygiene. Never boil motor units or cords, and make sure all parts are completely dry before reassembling.
Store Clean Pump Parts to Prevent Contamination
Once pump parts are fully dry, store them in a clean, sealable food storage bag or a dedicated container with a lid. This creates a barrier against dust and contaminants, preventing germs and mold from developing on residual moisture. Air-drying can take a full day or longer, so avoid rushing the process to ensure the parts are thoroughly dry. Use a container solely for pump parts to reduce the risk of cross-contamination. For proper hygiene, you can also use a bottle warmer to quickly heat stored milk only when needed, but never for drying parts. Some parents also find that using a 5-point harness for their infant’s car seat provides similar peace of mind regarding safety and containment. However, when using a bottle warmer, always follow the manufacturer’s instructions to avoid overheating the milk, which can destroy nutrients and pose a burn risk.
Place the stored parts in a clean, dry spot such as a cupboard, away from areas prone to moisture like sinks or humid corners. Handle the parts only with washed hands, and avoid touching the inside surfaces that contact milk. Disassembling the pump parts before storage promotes better airflow and quicker drying. However, reassembling is acceptable if you ensure the container stays clean and well-ventilated.
Replace Worn or Damaged Pump Parts
To keep your pump functioning effectively, replacing worn or damaged parts regularly is essential. Focus on duckbill valves and valve membranes, which often need replacement every 2 to 4 weeks with frequent use. For lighter pumping, extend that interval to about 2 months. Signs that these parts are failing include stretching, fraying, or warping, which diminish suction strength and increase the risk of contamination. For additional guidance on keeping hygiene high, consider reviewing top-rated mattress features for a clean sleep environment. Similar to how a jogging stroller offers superior durability for active use, these pump components require timely replacement to maintain performance.
Backflow protectors and diaphragms also lose elasticity over time. Replace them every 1 to 3 months if you pump heavily, or every 3 to 6 months with lighter use. If these parts become stiff or torn, your pump’s performance drops significantly. Breast shields generally last around 6 months but should be replaced sooner if cracks or discomfort occur during use. Tubing needs to be replaced when you notice moisture buildup, mold, or cracks—every 1 to 3 months for regular use. Adhering to this maintenance schedule helps ensure your pump remains efficient and hygienic.