If you’re wondering how to create a DIY pumping bra that offers both comfort and functionality, you’re in the right place.
Making your own allows for a customizable fit that can be more comfortable and leak-proof than store-bought options.
By following a few simple steps, you’ll be able to craft a personalized solution that keeps your hands free during pumping sessions.
Keep reading to learn the step-by-step process.
Why a Sports Bra Is Your Best Bet for This Hack
A sports bra is your best bet for a DIY pumping bra because it provides a snug, supportive fit that holds the flanges securely in place. Its fabric flexibility allows you to move comfortably while maintaining a stable suction seal. You can also adjust the straps to find the perfect tension for your body, preventing loose fabric from shifting and disrupting the seal. This even distribution of pressure keeps you comfortable during longer pumping sessions. Support is crucial; high-support sports bras are better suited for larger busts and broader rib cages than low-support styles. The built-in adjustments are essential for ensuring the pump stays securely in place across different body shapes and sizes. When selecting a bra, look for a high-quality model with a consistent reputation for durability and value to ensure the hack lasts through frequent use. For added convenience during feeding times, consider how adjustable features found in top feeding chairs can similarly enhance comfort and stability. For the perfect fit, refer to detailed car seat cover reviews that compare top options to find a compatible material and design. Overall, a sports bra offers the combination of support, adjustability, and comfort that makes it the most reliable choice for this hack.
How to Mark Your Nipple Placement for Perfect Alignment
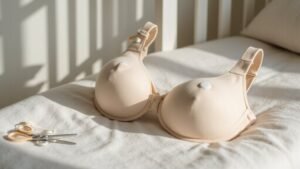
To accurately mark your nipple placement for perfect alignment, start by putting on your supportive sports bra. Remember, nipple positions shift once the bra is on, so marking beforehand can lead to errors. Use a washable marker to gently dot the natural nipple position on each breast, keeping the marks small for precision. Don’t assume your nipples are perfectly symmetrical; mark each side separately since one breast may sit higher or lower than the other. Stand in front of a mirror to verify the dots land directly over the nipples inside the bra cups. Check from the side as well, especially if your nipples hang low or slope downward. These marks indicate where the flange openings will center, not their size. Accurate placement ensures proper alignment, prevents errors, and helps achieve even suction later. Ensure the bra is snug but comfortable for accurate marking before removing it to prepare for cutting.
Cut a Snug ¾-Inch Circle, Not a Giant Hole
When cutting your opening, aim for a snug ¾-inch diameter circle rather than a larger hole. A smaller cutout helps prevent the flange from shifting and maintains a better seal. Position this circle about two inches above the bottom elastic for consistent placement. Use sharp fabric scissors to ensure a clean cut, and test the fit immediately—your flange should pass through snugly, not loosely. This smaller opening reduces fraying and stretching over time, keeping the seal intact. To maintain control, keep the fabric taut as you cut to ensure precision. After cutting, briefly melting the synthetic edges with a lighter helps stabilize them, preventing unraveling or widening. A secure, snug fit keeps your pump hardware stable and ensures a reliable seal every time. For added durability, consider how waterproof materials resist moisture and wear, similar to car seat covers. Before cutting, mark the nipple location on the fabric to verify the circle aligns with your natural nipple position, avoiding incorrect cuts. For added safety, a bottle warmer can be used to gently heat expressed milk without compromising its nutrients. If the fabric you choose has a cotton blend, finishing the raw edges with a simple hem stitch can mimic the clean look of a crib bed skirt.
Got a Double-Layer Bra? Here’s How to Cut It
To cut a double-layer bra properly, you should only remove the outer layer first. Start by marking your nipple position while wearing the bra, ideally with a washable marker for easy adjustments later. Use this mark as a guide for your cut. Cut only the outer fabric, leaving the inner layer intact to keep the flange stable. Make a small vertical slit about 1 inch long and try fitting the flange afterward. If you need the opening larger, cut gradually in small increments. Avoid cutting both layers at once, as this can weaken support and destabilize the bra. Fold the bra so the marked points align symmetrically. After adjusting, check the snugness; the fabric should hold the flange in place without needing to support it by hand. If the flange shifts, the cut is too big, and you should trim it back slightly. Always cut only what’s necessary to maintain a secure and balanced fit. Many commercial strapless breast pump bras are essentially just strapless bras with holes.
Heat-Seal Synthetic Edges for Durability
Heat-sealing synthetic edges is essential for preventing fraying and extending your bra’s lifespan. To do this, use a hot tool like a soldering iron, hot knife, or lighter. Nylon and polyester are ideal materials because they melt rather than burn, allowing for clean fiber fusion. Before sealing the edges of your cut bra, test the heat on a small scrap to avoid scorching. However, since all heat-friendly fibers tend to frizz, tangle, and clump with repeated handling, sealing the edges cleanly on the first pass minimizes stress on the fiber and reduces future fraying. Apply the heat evenly and steadily along the raw edge, moving quickly to prevent burns or melting in one spot. The goal is to create a hardened, sealed edge that locks in loose threads and boosts durability. Work in a well-ventilated area and wear heat-resistant gloves to protect against fumes and burns. Proper heat sealing not only prevents fraying but also ensures a professional, long-lasting finish on your pumping bra.
Test Fit Your DIY Pumping Bra for a Perfect Seal
To ensure a proper fit for your DIY pumping bra, start by putting the bra on without the pumps to check the band. It should sit snugly on your rib cage and stay below your breast tissue. Examine the seam placement; any seam digging into your breast or riding up can break the seal. Next, insert the flanges so that your nipple is centered within the tunnel. Adjust the straps by tightening or loosening them until the flanges sit flush against your skin with no gaps. Lean forward and observe if the pumps shift inward; they should stay steady. Look for light between the band and your rib cage—if visible, the fit is too loose. The seal needs to be even all around the flange circumference. If fabric bunches under the rim, it can break suction. Aim for a comfortable, stable hold without pinching, ensuring the seal remains airtight during use. A compatibility check can help confirm your flange size is correct for your pump model. Correct band placement generates backward pressure to improve pumping output and support. For a newborn, a bassinet stroller offers a convenient hands-free option while you pump on the go. For added stability during use, consider choosing bras with secure straps that prevent shifting like those in high-quality dresser designs.
Fix Holes Too Big, Too Small, or Off-Center
If a hole is too large, your flange may not stay securely in place. To fix this, sew the opening smaller or add a structured patch that extends beyond the edge to prevent the fabric from stretching back out. For holes that are too small, gradually trim the edges and finish them to prevent fraying. Test-fit the flange after each snip to ensure a proper fit. If a hole is off-center, close the original opening with stitches, then mark and cut a new, centered hole. Accurate marking is essential for maintaining the longevity of your bra fabric. When choosing repair materials, options include moleskin, thick fabric, or ribbon for patches. Hand-stitch the patch near the edge to stop fraying from spreading. You can also look for bassinet fitted sheets made from secure, stretch-resistant fabric to understand what materials hold up against repeated use. Use tight stitches and extend the patch beyond the hole’s edges to ensure the fix lasts through washes and pumping sessions. Alternatively, using sticky tape over the hole can secure the flange temporarily while prioritizing comfort, similar to how it keeps a bra underwire in place for immediate wear. For long-term durability, ensure your patch material is both waterproof and leak-proof storage to mimic the reliable seals found in quality milk collection systems. For a more permanent solution, consider adding a reinforced fabric panel similar to the sturdy construction found in top-rated chest of drawers.
Switch Flange Sizes Without a New Bra
If you need a different flange size, you don’t have to buy a whole new bra—just swap out the flange itself after testing the new size for fit. Start by measuring your nipple diameter at the base, avoiding the areola, when your nipple is in a neutral state. Add 2 to 4 millimeters to this measurement as a starting point. Proper fit means your nipple moves freely without rubbing, swelling, or pain during use. To switch sizes, replace one flange at a time and use the new size for part of a session before switching back to the original. Gradually increase the time spent with the new flange over a span of two to three days. If you experience pain, revert to the previous size temporarily. The body must adapt to the altered stimuli of the new flange to maintain milk flow. You can also consider silicone inserts made from reusable materials or alternative fabrics if exact flange sizes aren’t available. This approach helps maintain milk output while your body gradually adjusts to the new flange size. Ensure the flange setup is securely fastened to prevent movement during use. Just as with car seats, any plastic pumping part should be replaced if it shows signs of wear or damage, and you should always check the manufacturer’s safety limits for the flange’s lifespan. To clean flanges between swaps, follow gentle washing steps similar to those for bottle warmer parts to avoid residue buildup.
How to Wash Your Modified Bra Without Damaging the Openings
To wash your modified bra without damaging the openings, always use a gentle approach. Place your bra in a mesh lingerie bag to protect it during the wash. Fasten all hooks to prevent snagging on other items. Use a delicate cycle with cold water, as heat can weaken elastic fibers and cause warping. Avoid washing your bra with heavy or rough fabrics like denim, which can rub and damage the delicate modifications.
After washing, never put your bra in the dryer. Instead, reshape it while damp to help maintain the cup structure and the integrity of the openings. Air-dry flat on a clean towel or suspend it from the center gore, avoiding hanging by the straps, which can stretch them out. For optimal support during feeding, your modified bra should feel as secure as a top-rated bouncer seat holds a newborn. This careful process helps preserve the modifications and keeps your bra looking and fitting its best over time.
When a Different Sports Bra Style Works Better for Pumping
A different sports bra style often works better for pumping because it provides the right support and stability. High-impact sports bras with adjustable features—like wider straps and a customizable band—help accommodate postpartum body changes and keep flanges securely in place. For front-opening designs, a split-front style allows you to insert flanges quickly without removing the bra entirely, saving time during busy pumping sessions. When selecting a bra, consider factors like quality and performance to ensure it meets the same standards found in top-rated baby monitors. Look for bras made of soft, flexible materials to reduce the risk of clogged ducts and comfort. Encapsulation or compression bras with high support prevent slipping and shifting, especially with wearable pumps. If your DIY bra sags or shifts during use, switching to a structured nursing or high-impact sports bra will generally improve stability, comfort, and pumping efficiency overall.