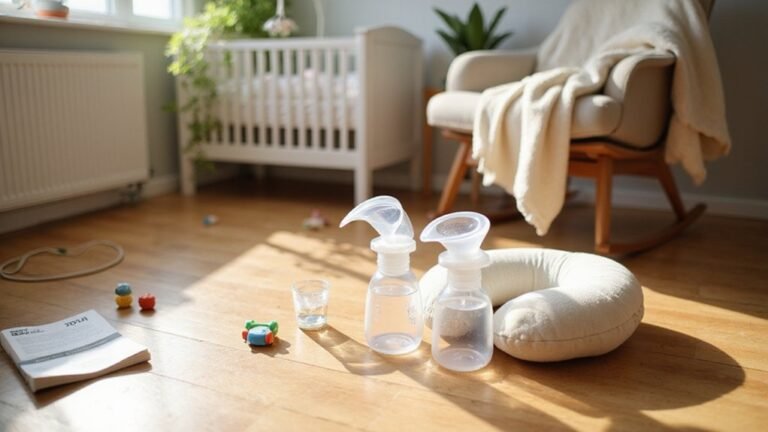
If you’re wondering how to get the most out of your Lansinoh manual breast pump, you’re in the right place. Using a manual pump can be straightforward once you know the steps, from assembly to effective pumping techniques.
With a few simple tips, you’ll be able to comfortably express milk whenever you need.
Keep reading for a complete guide to mastering your pump.
Why Prep Work Matters Before You Start Pumping
Preparation is key before pumping because a well-prepared environment and routine help prevent contamination, keep you comfortable, and promote a stronger let-down reflex. Start by washing your hands with soap for 10 to 15 seconds, then dry them with a clean towel to ensure good hygiene. Remove any creams from your breasts if advised by your healthcare provider to avoid contaminating your pump or milk.
Review the instruction manual for your pump so you can assemble and clean it confidently without confusion during your session. Have spare parts ready—like additional bottles, valves, or membranes—to avoid delays if something breaks or gets lost. Set up in a quiet, comfortable spot with good back support to have a calm pumping experience. Organizing your supplies in a chest with multiple drawers can keep everything accessible and reduce clutter during pumping sessions.
Using a warm compress or gently massaging your breasts before you start can encourage milk flow. Proper nipple care is essential; keep the area clean to prevent irritation or infections. Gather clean containers and labels for your milk, as well as a towel to catch any drips. Snacks and water nearby can help you stay comfortable and energized. Just as you must confirm the correct installation angle of an infant car seat for safety, verify that your pump’s backflow protector is seated correctly to maintain suction.
Rushing through these steps or skipping them can reduce your pumping efficiency. Taking time to prepare reduces stress and helps your let-down reflex work naturally, making the process smoother and more productive. When assembling equipment, check that all connections are tight and secure, similar to how you would verify a Graco car seat base is properly locked before use.
Assemble Your Lansinoh Manual Pump Step by Step
To assemble your Lansinoh manual pump, start by inserting the stem into the silicone diaphragm. Then, place the diaphragm onto the pump body and press around the rim to ensure a secure seal. Gently secure the white valve from underneath, making sure it sits flush with the pump body—do not force it into place. Screw the bottle onto the pump body, then attach the ComfortFit breast cushion tightly. Next, fit the handle by aligning the groove with the stem and pressing until it clicks into place. Set the handle to the first notch to activate the Let Down Phase. Insert the bottle into the stand for added stability. Maintaining proper hygiene requires you to wash hands thoroughly before handling any pump components. Before use, check all connections to confirm there are no gaps and that the handle moves smoothly. For additional comfort during pumping, some parents prefer silver nipple cups for soothing soreness between sessions. It is important to transition your child out of a car booster seat only when they meet the recommended height and weight for seat belt safety. Keep your pump accessories clean after each use, and consider storing the parts in a clean container when the pump is not in use. For safe sleep practices, ensure your baby’s sleeping area is free of loose bedding or soft objects.
Get the Right Fit for Your Lansinoh Manual Pump
To ensure a proper fit for your Lansinoh manual pump, measure your nipple base-to-tip accurately. Use a ruler to find your measurement, focusing only on the nipple itself, not the areola. Match this measurement to Lansinoh’s cushion size guide: up to 18 mm requires a 21 mm cushion, 18–22 mm needs a 25 mm cushion, and larger sizes correspond accordingly. Measuring correctly helps you avoid safety risks like pinching or reduced milk flow that can occur with an improper fit, similar to how choosing a dresser involves considering chest stability for child safety. For more personalized guidance on flange sizing, consult an expert review of top flange options to compare features for your specific needs. Selecting a cover for car seat that matches your vehicle’s dimensions follows a similar principle of precise measurement for a perfect fit.
Start with the 25 mm flange provided with your pump. Check the fit by gently inserting your nipple: it should move freely within the tunnel without touching the sides. If it rubs or causes discomfort, size up to a larger cushion. If there’s too much space around the nipple, size down for a tighter fit. During pumping, the cushion should seal securely against your breast without digging in or causing pinching. A proper fit makes pumping more comfortable and reduces soreness. Breasts often feel softer and lighter after pumping when the flange fit is ideal. Avoid an ill-fitting flange—too small may pinch or cause redness, while too large might draw in excess areola and reduce efficiency.
Pump Smarter: The Best Technique for Let-Down and Expression
To trigger a faster, more comfortable let-down, start with gentle breast massage across your entire breast to stimulate the milk ejection reflex. Follow this with light nipple stimulation, such as gently rolling or rubbing your nipples. These actions help initiate milk flow before you even begin pumping. Once you’re ready, position your thumb and index finger on opposite sides of your areola, well back from the nipple. Press back toward your chest wall, then compress your fingers together behind the nipple. Keep the compression steady and rhythmic, then release and repeat. Avoid sliding your fingers across your skin. Always begin with the lowest suction setting on your pump and increase only to a level that feels comfortable. If no milk appears, try repositioning your fingers around another part of your areola. This technique mimics your baby’s suckling rhythm and keeps your pumping sessions efficient and comfortable. Before you start, consider your overall pumping needs to ensure your chosen model aligns with your frequency of use and lifestyle. For optimal comfort during pumping, ensure your setup includes a clean, snug surface that supports your baby’s safe positioning, much like a well-fitted bassinet sheet prevents shifting. A supportive crib mattress, such as one made by Sealy, also promotes safe sleep posture for your infant.
Switch Between Let-Down and Expression Modes on Your Pump
Once milk is actively flowing, move the handle to the bottom notch to switch to expression mode. This setting delivers longer, deeper squeezes that help maximize milk removal. You can shift back to the top notch whenever your milk flow slows down. The goal is to match the pump phase to your current session: use the top notch for stimulation and the bottom notch for efficient milk removal. Your pump’s handle adjustment allows you to follow your body’s rhythm and needs precisely. For a more automated experience, some electric pumps like the Spectra S1 also offer dedicated let-down and expression modes. Just as you would choose a double stroller for travel based on your family’s needs, selecting the right pump mode helps match your body’s demands. Consider using a car seat protector to keep your pump parts clean and organized during travel.
Clean and Sterilize Your Pump Parts After Each Use
To keep your pump parts safe and functioning properly, clean all parts that contact breast milk immediately after each use. Disassemble all components, then hand wash them with dish soap and hot water in a dedicated wash basin—not in the sink to prevent cross-contamination. Rinse each part thoroughly with running water and air-dry completely on a clean towel or drying rack. Avoid using dish towels for drying, as they can transfer germs onto the sterilized parts. For thorough cleaning, always position parts to drain in a way that prevents water from pooling and attracting bacteria, similar to how you would dry a booster seat after washing. Choosing a high-quality crib mattress is similarly important for ensuring your baby’s safety and comfort during sleep.
For sterilization, boil disassembled parts for 5 to 10 minutes, following your pump’s specific instructions. Alternatively, you can use a microwave-safe steam bag designed for sterilization. Many of the top-rated sterilizers offer convenient steam or UV options for thorough sanitization. Regularly inspect the white valve and diaphragm for signs of wear, warping, or damage, as these issues can reduce suction effectiveness. Replace any parts that show damage immediately. Once dry, store your pump parts in a clean, dry area away from household contaminants to maintain their cleanliness and hygiene.
Use Your Lansinoh Manual Pump Away From Home
When pumping away from home, follow the same hygiene principles as at home. Begin by washing your hands thoroughly to prevent contamination. Carefully assemble the pump, making sure all accessories are packed and ready. Position the flange over your nipple so it’s centered, then press the ComfortFit cushion firmly against your breast to create a secure seal. Support your breast underneath to prevent air from escaping. Start with quick, gentle squeezes using the first notch to initiate let-down. Once milk begins flowing, switch to the second notch for slower, deeper expression. Continue until the milk flow slows substantially, ensuring an efficient session. Choosing the correct flange size for your comfort helps maintain breastfeeding benefits and prevents discomfort. After pumping, store the milk directly in the bottle or transfer to a separate container for later use. For a safe, sturdy result during assembly, ensure all connections are pressed tightly together before use. This pump is also a portable travel solution compared to bulky electric alternatives.
Fix Suction Loss: Check Valve, Seal, and Diaphragm
A suction loss in your Lansinoh manual pump is often caused by issues with the check valve, seal, or diaphragm. Start by inspecting the white check valve for tears, pinholes, or distortion, as these flaws prevent proper sealing and reduce suction. If damaged, replace it using the spare valve provided. Ensure the valve sits correctly in its slot; misalignment can significantly diminish pump performance.
Next, examine the silicone diaphragm and stem. They must fit snugly and securely into the pump body. A loose or improperly seated diaphragm hampers the creation of negative pressure necessary for suction. Check for torn edges, overstretching, or warping. If the diaphragm fails after cleaning and reinserting, replacing it is recommended to restore effective suction.
Finally, verify the seal between the ComfortFit breast cushion and the pump. This connection must be airtight to maintain suction. Always dry all parts thoroughly before reassembling, as moisture can compromise the seal. Reseat each component carefully step by step to ensure a complete, secure fit.
Extend Your Pump’s Life: Maintenance and Troubleshooting
Proper pump maintenance begins with thorough cleaning of all milk-contact parts after each use. Disassemble the pump first, then wash the breast cushion, bottle, handle, and bottle stand with dish soap and hot water or place them in the upper rack of the dishwasher. Rinse all parts completely and allow them to air-dry thoroughly before reassembling. Handle the small white valve carefully; avoid using a brush on it—hand washing helps prolong its lifespan. Before reusing any parts, inspect them for cracks or damage, and replace worn valves every 4 to 12 weeks depending on your pumping frequency.
For troubleshooting, start by examining the valve, diaphragm, and tubing for blockages or damage to address suction loss. Keep the tubing dry; never submerge the pump base in water—use a damp cloth to wipe it clean. Ensure all parts are fully dry before storing to prevent deterioration. Following these steps helps your pump stay reliable and extend its overall lifespan.