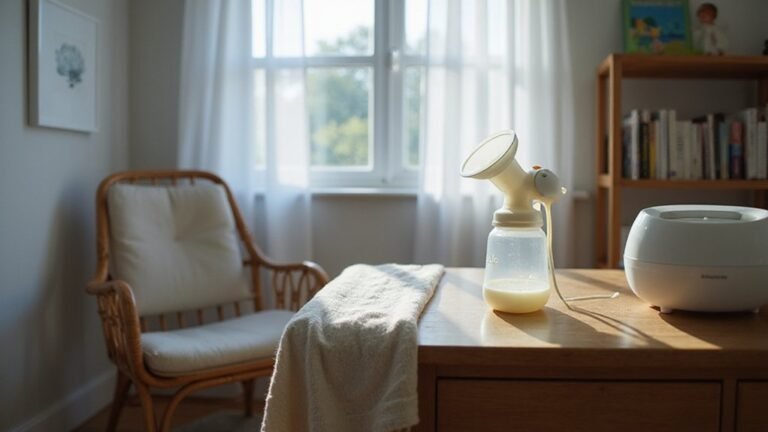
If you’re wondering how to keep your Momcozy bottle warmer clean and functioning well, you’re not alone. Regular cleaning can extend its life and ensure safe, healthy feeding for your baby.
In this guide, you’ll learn simple steps to wipe down the exterior, wash detachable parts, and descale the unit.
Keep reading for all the details to maintain your warmer effectively.
Unplug the Bottle Warmer and Let It Cool Down Completely
Unplug the bottle warmer and let it cool down completely before cleaning. This is the first and essential step in the maintenance process. Disconnect the power supply to ensure electrical safety before touching the heating chamber, lid, or water tank. Attempting to clean the device while it is still hot or plugged in increases the risk of electric shock and potential damage to the unit. This is particularly important as the lowering the crib mattress milestone for baby safety follows a similar principle of preventing access to hazards.
Allow the unit to cool for at least 10 to 15 minutes after the warming cycle ends. Hot surfaces and residual steam can remain for some time, so patience is key. During this period, promptly empty the water chamber to prevent residue buildup and odors. Just as parents watch for age and weight signs to determine when to stop using a booster seat, you should wait for clear cooling cues before handling the warmer. Do not remove any parts until you are certain it has cooled thoroughly to avoid burns. Once the warmer is cool to the touch, you can safely proceed to the next cleaning steps. Notably, the warmer uses intelligent heating technology that adjusts temperature based on bottle material and milk status, so allowing it to fully cool preserves the sensor calibration. For optimal upkeep, use only a soft cloth to wipe down the exterior, similar to the gentle, non-abrasive approach recommended for cleaning vinyl surfaces.
Gather Your Cleaning Supplies for Safe and Easy Maintenance
Once the warmer is completely cool and unplugged, gather your cleaning supplies for safe and easy maintenance. You will need a soft, damp cloth to wipe the exterior surfaces, warm water mixed with a mild soap for cleaning detachable parts, and a small cleaning brush to reach narrow adapter areas. For descaling, prepare a mixture of white vinegar and water in a 1:2 ratio, using cold water to prevent damage. Rinse detachable parts thoroughly with clean water after cleaning. Avoid using abrasive cleaners, antibacterial agents, or chemical solvents, as they can damage surfaces. Always unplug the warmer first and let it cool fully before cleaning. Collecting all tools beforehand ensures you can complete maintenance smoothly without interruptions. For additional guidance, refer to best car seat cover reviews to compare product features and cleaning tips. For parents setting up a cleaning station, a nursery rocker recliner provides a comfortable spot to sit while handling these maintenance tasks.
Wipe Down the Interior and Exterior After Every Feed
After you’ve finished a feed, power off, unplug, and let the warmer cool completely before wiping it down. Wiping the interior and exterior after every use ensures routine maintenance prevents stubborn residue buildup. Use a damp, soft cloth on the interior surfaces—gentle wiping avoids scratches and damage to delicate materials. For the exterior, wipe with a damp cloth while keeping it dry enough to protect electrical components. Avoid harsh cleaners, abrasives, or sharp tools as they can damage surface materials and reduce the warmer’s lifespan. A quick post-feed wipe is enough for daily upkeep, so you won’t need intensive cleaning later. Always confirm a tight fit for the base to ensure the warmer is stable and securely placed during use. Before the next use, dry all surfaces thoroughly and check for any leftover residue to keep your warmer clean and ready for use. For safety, treat the warmer like a car seat base that must be securely attached to function properly and avoid accidents. Regular cleaning also helps you monitor key milestones such as wear on the heating element.
Wash Detachable Parts in Warm, Soapy Water
Unplug the bottle warmer and let it cool completely before disassembly. This is a crucial safety step to prevent burns or electrical shock. Next, detach all removable parts such as lids, trays, silicone rings, bottle holders, and spray arms—that’s based on your model’s specific removal order. Ensure each piece is fully separated to avoid trapped residue. For long-term storage, consider keeping these parts in a chest of drawers to organize them neatly in your space. If you are also building a cover for the warmer, refer to durable material choices to ensure long-lasting protection. To preserve the integrity of silicone components, avoid exposing them to direct heat sources that could cause warping.
For cleaning, wash all detachable components in warm, soapy water. Use a mild, baby-safe detergent along with a soft sponge or bottle brush. Gently scrub hard-to-reach areas and silicone parts, but avoid abrasive cleaners or scouring pads—they may scratch surfaces. If some pieces are lightly soiled, soak them briefly before scrubbing. Pay special attention to seals and rings to maintain their fit and function. Do not immerse the base unit; it should stay dry. Rinse each part thoroughly under running water to remove all soap residue, checking crevices carefully for any lingering detergent.
Rinse and Air-Dry All Removable Components Thoroughly
Rinse each removable part thoroughly under clean, running water until all soap suds and cleaner residues are gone. Pay close attention to crevices, seals, and corners that contact milk or steam, ensuring no residue remains trapped. Use a gentle water flow to prevent surface wear. For stubborn residues, employ soft cleaning tools like a brush before completing your final rinse.
After rinsing, focus on proper drying. Place all parts in a clean, dry area and allow moisture to escape from joints and crevices to prevent mold growth. This principle of thorough drying is similar to how rear-facing car seats protect infants by keeping their vulnerable airways clear and secure. Make sure silicone rings and seals are dried completely so they fit securely and maintain leak resistance. Avoid stacking wet parts, as this traps moisture and hinders drying. Only reassemble your warmer once every component is fully dry, with no residual droplets in seams or corners. For the best results, follow the care and longevity guidelines found in the Spectra pump comparison to ensure your device remains in top condition. Choosing a standard chair rail height can help you arrange your drying area at an ergonomic level for easier handling. This thorough drying process supports hygiene and helps extend the life of your device.
Descale Your Momcozy Bottle Warmer Every Four Weeks
To keep your Momcozy bottle warmer functioning properly, descale it every four weeks using a vinegar-and-water solution. This schedule helps prevent scale buildup from interfering with performance. To do this, mix 60 ml (2 oz) of white vinegar with 120 ml (4 oz) of cold water. Pour the mixture into the warmer and run the steam setting for 10 minutes. Allow the solution to sit until all scale dissolves, which may take up to 30 minutes if there is heavy buildup. After the soaking, empty the unit and rinse thoroughly with clean water. Repeat the rinsing process if any vinegar odor persists. In areas with hard water, more frequent descaling might be necessary to manage faster scale accumulation. Following this routine ensures your bottle warmer remains reliable and efficient. For monthly care, always rinse the tank thoroughly after the descaling cycle to remove any remaining vinegar residue. Before starting, gather affordable cleaning supplies like a measuring cup and soft cloth to keep the process simple and avoid the mistake of using abrasive tools that could scratch the interior. If you are also using a breast pump, a comfortable breastfeeding experience can be supported by keeping all feeding equipment clean and descaled. Always steer clear of harsh chemical cleaners, as natural descaling methods are safer for baby gear and prevent potential residue from contaminating bottles.
Avoid These Cleaning Mistakes to Prevent Damage
Avoid these cleaning mistakes to prevent damage. Never immerse the main unit in water; doing so ruins electrical components. Instead, wipe the exterior with a damp cloth. Harsh chemicals or abrasive cleaners should never be used because they damage the finish. Stick to mild soap and water for cleaning.
Metal tools should also be avoided on the heating area because they can scratch and cause electrical damage. Use soft brushes or cloths instead. Always unplug the appliance and let it cool before cleaning. Hot surfaces can burn, and cleaning a live device is dangerous.
Limescale buildup from mineral water requires proper attention. Use white vinegar for descaling, and rinse thoroughly to remove all residue. Repeating the descaling process ensures the appliance remains free of deposits and performs optimally.
Dry and Reassemble Your Bottle Warmer Before Storing
Make sure every part of your Momcozy bottle warmer is completely dry before storing it. Moisture left inside can cause mildew or electrical issues later. Air drying is the most effective method because it’s free and reduces the risk of trapped water. Avoid using towels or cloths that might leave fibers or moisture behind. Once dry, check all removable components—such as silicone rings, lids, and the warming chamber—to confirm they are fully cool and dry. Ensure the silicone ring seats properly and the lids click securely into place. Visually inspect joints and seams for any trapped water or droplets to prevent future leaks. Only reassemble when every part has dried thoroughly—being “mostly dry” isn’t enough. This extra step protects your warmer’s function, prevents moisture buildup, and helps keep your investment in good condition for the next use. Choosing the right crib ensures your baby’s sleep environment is safe and comfortable, much like maintaining a clean warmer protects your feeding routine. For strollers, regular cleaning and maintenance ensures smooth operation and extends the life of your gear.
Store the Clean Bottle Warmer in a Cool, Dry Place
Store your Momcozy bottle warmer in a cool, dry place away from direct sunlight. Keep it in a well-ventilated area to prevent mold and mildew buildup. Avoid storing it near sinks, wet counters, or other sources of moisture, as moisture can damage the device. A shaded cabinet or returning it to its original packaging offers good protection against dust and temperature fluctuations. Neatly coil the power cord to avoid tangling or damage. Following these storage tips helps maintain the warmer’s performance and hygiene over time.