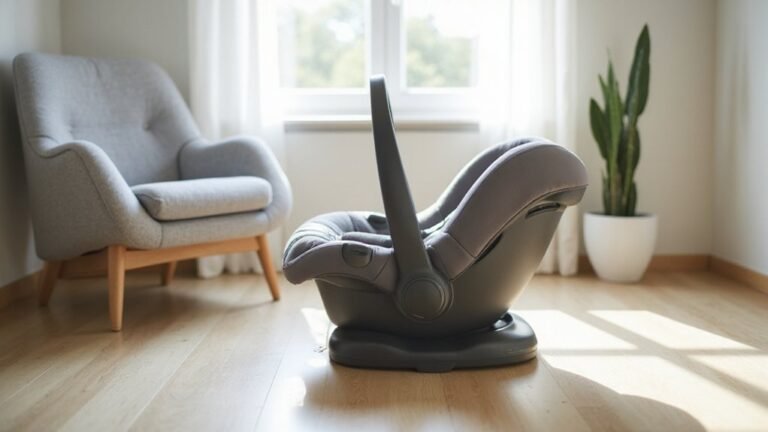
Wondering how to securely install an infant car seat? Getting it right can feel overwhelming, but it’s crucial for your child’s safety.
Proper installation involves placing the seat in the back seat, ideally in the middle if it fits, and ensuring it’s tightly secured.
Keep reading for clear, step-by-step instructions to help you do it confidently.
Choose the Back Seat for Your Rear-Facing Infant Car Seat
The back seat is the safest place for your infant car seat because it keeps your child away from the dashboard and airbags. Always choose the rear seat for maximum protection. The middle rear seat is ideal because it reduces side-impact exposure, but only if you can install the seat securely. Compatibility with your vehicle is essential—some cars have center-seat restrictions that make a tight, safe installation impossible. In those cases, an outboard seat (either side) with a secure fit is better than a loose installation in the middle. This is because rear-facing seats better support the head, neck, and spine by distributing crash forces evenly across the shell. When selecting a car seat, look for models with a 5-point harness for superior safety and adjustability. Remember, if your child is under 1 year old, they must ride rear-facing. Keep them facing backward until they reach the height or weight limit specified by the car seat manufacturer. Always check both your car seat manual and your vehicle owner’s manual to ensure compatibility and installation guidelines for a safe, comfortable ride. For added convenience, many parents find that combining a safe car seat setup with a reliable electric breast pump helps streamline feeding routines on the go.
Thread the Seat Belt Through the Correct Belt Path (No Twists)
Once you’ve chosen the safest seat position, thread the vehicle seat belt through the correct belt path—the one designed for your seat’s rear-facing orientation—and remove all twists before buckling. For infant seats, this usually means the lower path on the base or, if installing without the base, the seat’s designated opening. Twisted webbing reduces stability and prevents proper tightening. You must feed the belt flat through the belt path, ensuring no twists exist on either the lap or shoulder portion. Straighten any twisted webbing before you buckle. A flat belt also makes it much easier to inspect and tighten evenly later. If the shoulder belt is too short to wrap around the seat in this path, the tipping trick can be used to lift the seat and guide the belt into the shoulder belt guide securely. This method ensures the seat stays tight compared to alternative options like booster seats, which lack the same level of restraint for younger children. Ensuring the belt is free of twists also mimics the flat, stable condition of best crib bed sheets to maintain consistent tension and safety. A snug installation on a solid, flat crib mattress foundation provides the same reliable stability for the car seat base.
For convertible seats, locate the rear-facing belt path—typically under the child’s leg area. Always verify your seat’s manual, as some seats use a European belt path where the shoulder belt wraps around the back of the carrier. Proper threading without twists ensures maximum stability and safety of the car seat during travel.
Lock the Belt and Tighten Using Your Body Weight
To lock and tighten the seat belt using your body weight, follow these steps. First, check your vehicle’s manual to see whether the retractor needs to be fully extended or if the locking mechanism is activated by the latchplate or a locking clip placed no more than 1 inch from the latchplate.
Next, press down firmly on the car seat with your knee or full body weight to compress the vehicle cushion. This creates slack that allows you to pull the lap belt snugly before locking it in place. For retractors, maintain pressure as you slowly retract the shoulder belt; for locking clips, hold tension, pinch the webbing, and clamp the belt. Vehicles manufactured before 1996 require a locking clip for this step, as they lack locking seat belts. Choosing a seat cover that won’t interfere with the belt path is easier when you check reviews for a perfect fit beforehand.
Then, tighten the belt in small increments, using your body weight each time to remove slack. Keep applying pressure until the belt feels taut and secure. If any slack reappears, press down again and pull tighter. Avoid releasing the pressure until the belt remains firmly in place.
Pass the Inch Test: Base Shouldn’t Move More Than 1 Inch
Before moving to the next step, perform the inch test to verify the base’s security. The base should not shift more than 1 inch in any direction along the belt path. To do this, grasp the base firmly at the point where your seat belt passes through—whether it’s a lap belt, shoulder belt, or LATCH system—and tug side to side and front to back. If it moves more than an inch, it’s too loose. Avoid checking at the top of the seat, as this can give a false reading. Be aware that your car’s interior features, such as contoured seats or soft upholstery, may affect how tight the base feels. After making adjustments, recheck to ensure the fit remains snug. Do not rely on appearance; a seat that looks secure might still fail this test. If the base exceeds the 1-inch movement limit, reinstall it and retest until it passes. Ensuring zero movement beyond this limit is essential for a safe and secure installation. Never test the seat by grabbing the head or armrests, as this focuses on the belt path for accurate stability assessment. For added peace of mind, remember that a secure base functions like a snug fitted sheet on a mattress, hugging the seat contours without any slack. A chest of drawers with multiple drawers stays stable only when each drawer is properly aligned and securely fastened. When comparing models, note that rotating infant car seats often feature a rigid LATCH system that can reduce the base’s movement during this test, making them easier to install tightly.
Is Your Recline Angle Correct? Set It to 30–45
Check the recline angle and set it between 30 and 45 degrees from vertical. For newborns, aim closer to 45 degrees to support their airway and head control. Older infants with better head control can be positioned closer to 30 degrees, but always follow your car seat manual.
Your base’s angle indicators—often colored lines or bubbles—show the correct range. Use the recline adjustment foot to tilt the base until the indicator reads within the zone. Ensure the base is on a level surface for an accurate reading. An upright position risks your baby’s head slumping forward and blocking their airway. A reclined position that exceeds the recommended range can reduce crash protection. If you cannot achieve the proper angle, try adjusting the installation or using a different approved seat—never exceed the specified range. For additional guidance, consult top-rated Uber-friendly infant car seats that prioritize proper recline angles for safe travel. Experts recommend that infants should not remain in a car seat for more than two hours at a time to prevent breathing difficulties. A mini crib provides a smaller sleep space that can help parents keep the infant near their bedside for safer sleep transitions.
Position Your Baby in the Rear-Facing Infant Car Seat (Harness at or Below Shoulders)
Once your baby is seated with their back and bottom flat against the car seat, route the harness straps through the slots at or below their shoulders—never above. This ensures the straps are positioned correctly for rear-facing crashes, providing the best protection. The straps should lie flat and untwisted over each shoulder. Tighten the harness until you cannot pinch any extra material at the collarbone. A snug fit prevents excessive movement during a crash and helps keep your baby’s head from slumping forward, protecting their airway. Avoid using bulky car seat accessories that might interfere with this fit. Check that the straps are aligned with your child’s shoulders and that their bottom stays all the way back in the seat. Precise positioning of the harness makes the safety system effective and contributes to a safer ride. A similarly snug and flat harness fit is recommended when using standard crib mattresses for safe sleep. You can learn similar folding techniques for a Graco jogging stroller to avoid damaging its parts. For the best protection, always install the car seat at the correct recline angle to prevent your baby’s head from slumping forward and blocking their airway.
Final Checks: Chest Clip at Armpit Level, Secure Click, and 3 Common Mistakes
The three most common mistakes involve the chest clip placement and checking process. First, placing the chest clip too low on the stomach reduces restraint effectiveness, increasing the risk of the harness slipping or coming loose. Second, positioning the clip too high near the neck can create airway concerns and compromise safety. Third, skipping the final click check leaves a buckle partially engaged, which can fail during a ride. These mistakes are as critical to address as selecting a top rated crib mattress, which ensures a safe and consistent sleep environment. For the playpen mat that often accompanies the car seat during travel, regular cleaning with mild soap prevents buildup of dirt and allergens.
Always check the chest clip at armpit level and ensure it clicks securely every ride. Remember that the clip can shift during loading, so recheck its position after every adjustment. After positioning the harness, give the buckle a firm tug to confirm it is fully engaged with a clear click. Proper placement and consistent checks help ensure safety and maximize restraint effectiveness, much like how a top rated crib mattress prioritizes structural integrity and consistent performance for a sleeping infant.