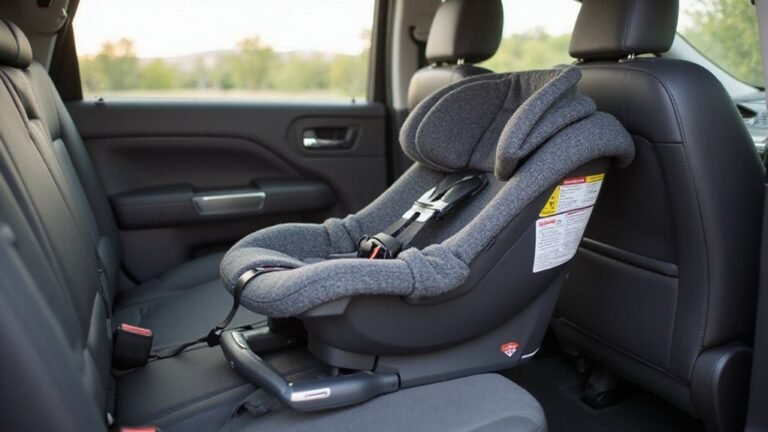
Worried about installing a rear-facing car seat correctly? Ensuring your child’s safety on the road means getting the installation just right.
With a few straightforward steps, you can make sure the seat is secure, at the right angle, and comfortable for your little one.
Keep reading to learn the essential tips for a safe and proper setup.
Why Rear-Facing Is the Safest Position for Your Child
Rear-facing car seats are the safest choice for your child because they align with the body’s natural biomechanics during a crash. Instead of concentrating forces on a small area, they distribute impacts across the entire back, acting like a protective shell that absorbs energy before it reaches your child. This position keeps the head, neck, and torso properly aligned, which is especially important for young children who have disproportionately large heads and weaker spines. Using a rear-facing seat can significantly reduce the risk of serious neck strain and whiplash motions, making it a key safety measure. Research indicates that children under two placed in rear-facing seats can have up to 75 percent lower chances of injury or death in crashes. Additionally, in frontal and side-impact collisions, rear-facing seats diminish head accelerations and neck forces by as much as four times compared to forward-facing seats, providing crucial protection during a crash. This is because the protective shell effectively cradles the child’s entire body, preventing the dangerous whiplash motions that forward-facing seats cannot avoid. The safety science behind this design relies on the seat absorbing crash energy while keeping the child’s spine in neutral alignment. For optimal protection, selecting a car seat cover that fits securely and doesn’t interfere with harness straps is also important for maintaining safety.
What You’ll Need to Get Started (Manuals and Tools)
Before you start the installation process, gather your car seat’s instruction manual and your vehicle’s owner’s manual. These manuals are your primary guides and contain model-specific information, such as belt paths, recline indicators, and whether you’ll need to use a base. Always refer to these manuals first because they override any generic advice. Since LATCH was developed to install child safety seats without seat belts, confirm whether your vehicle has the required lower anchors and top tether anchors. Comparing the best swing for newborn can also help parents understand how different products prioritize safe recline angles.
Run through your installation checklist next. Confirm you have the vehicle’s lower anchors or seat belt, and ensure the car seat’s connectors are ready. Check that the harness slots sit at or below your child’s shoulders for proper fit. Make sure the recline angle, as shown in your manual, is correct; this is essential for safety and comfort. You may also want to have a pool noodle or mirror on hand—only if your manual allows them, as some manufacturers prohibit these aids.
Finally, before securing the seat, verify that there are no twists in the belt webbing or LATCH straps. Twisted straps can compromise the installation’s safety and effectiveness. Preparing these tools and verifying details beforehand will help ensure a smooth and secure setup.
Where to Place a Rear-Facing Car Seat (Back Seat Only)
The center back seat generally provides the highest level of protection from side impacts, but only if you can install the car seat securely in that spot. Check if the seat material allows for a tight fit; if it’s too soft or flexible, the installation may not be safe. In that case, opt for an outboard seat, either on the driver or passenger side. For infants, choosing the best high chair involves similar considerations of safety and fit during feeding. When selecting a feeding chair, be sure to note the chair rail height to ensure it aligns properly with your table for a secure fit. Just as with car seats, the firmness and support of a feeding surface can impact your child’s overall safety and comfort.
Ensure the seat you choose is suitable for a rear-facing car seat: it must be forward-facing and have enough head support for the car seat’s top when installed. Never place a rear-facing seat in the front seat if the vehicle has an active airbag, as airbags can cause serious injury. Any back seat position is safer than the front, so prioritize a secure, correctly installed seat in a rear seat, even if that means using an outboard position.
Install a Rear-Facing Seat With the Seat Belt
To install a rear-facing car seat with the seat belt, start by reading both the car seat and vehicle owner’s manuals for model-specific belt routing and locking instructions. Place the seat in the back seat, then route the seat belt through the correct rear-facing belt path, ensuring there are no twists before buckling. Follow your vehicle’s seat belt guidelines to secure it properly; this may involve locking the belt using the vehicle’s system—fully extend and then retract the shoulder belt—or using the car seat’s built-in lock-off. Press down firmly on the seat while tightening the belt to remove slack. The seat should not move more than 1 inch at the belt path. Confirm the recline angle using the built-in indicator and make adjustments if necessary before final tightening. Additionally, verify the seat suits the child’s height, weight, and age before installation to ensure it is appropriate. For added peace of mind, research top convertible car seats to compare quality and value before purchasing a seat. Once tightened, recheck the seat for movement and slack to ensure it’s secure. Proper locking and tightening are crucial for safety; revisit these steps if any instability remains. Parents can also seek insurance coverage for certain child safety products to reduce costs. Like a dresser, a car seat must be stable and long-lasting to ensure it remains safe over years of use.
Install a Rear-Facing Seat With LATCH/UAS
Install a rear-facing seat with the LATCH/UAS system by first consulting both the car seat and vehicle owner’s manuals. Verify the specific anchor locations and belt path routing for your vehicle, as these can vary by model. Ensure the seat is placed in the back seat, with the base laid flat against the vehicle seat back. Fully extend the lower anchor straps before routing them through the rear-facing belt path.
Attach each connector to its own lower anchor, listening for an audible click. Tug gently on each strap to confirm a secure attachment. While tightening the straps along the belt path, apply firm downward pressure to stabilize the seat. The center of the back seat is the safest installation point. Tighten until the seat moves no more than one inch side to side or front to back. Achieving a snug fit is similar to finding the correct flange sizing for a breast pump, as both require precise adjustments to ensure proper function and comfort.
Check that the straps lie flat without twists and that the angle indicator is properly set for rear-facing position. Finally, perform a firm tug test at the belt path to ensure the seat is securely installed and won’t shift significantly during normal driving conditions.
Set the Recline Angle for the Correct Fit
Start by using the seat’s adjustment foot to change the recline angle. If you need finer adjustments, support materials like a tightly rolled towel or pool noodle are permitted. Place these only in the vehicle seat bight as directed to ensure proper positioning. Avoid exceeding the manufacturer’s approved range, as too upright can restrict your airway, while too reclined increases the risk of ejection during a crash. Proper recline angle supports both comfort and crash protection before moving on to the next step. For additional protection, look for waterproof covers that safeguard your car seat from spills and moisture. Always confirm a tight fit by gripping the seat at the belt path and checking for less than one inch of movement. For organizing your installation tools, consider a chest with 8 drawers to keep items like towels and pool noodles readily accessible.
Test for Tightness (The Inch Test)
Once the recline angle is set, the inch test ensures your installation is secure. You check for seat stability by applying a firm tug at the belt path—not at the headrest or top edge. Grip the seat near where the seat belt or LATCH strap attaches and push it side-to-side and front-to-back. Acceptable movement is less than one inch at that spot. If the seat shifts more than that, your installation is too loose. Tighten the belt or LATCH strap and retest. Some wiggle at the top of the seat is normal, as long as the belt path remains tight. Use only a firm handshake’s amount of force—no excessive pulling. Repeat the test after any adjustment until the seat passes. Use your palms and fingers to feel for movement in the seat during the test. For added safety, always check that the harness clip is positioned at armpit level. Choosing a car seat with a reliable base and installation system can simplify achieving a secure fit. Before each use, always double-check that the car seat cover is properly secured without interfering with the harness path.
Adjust the Harness for Rear-Facing Fit (Snug and Flat)
To ensure a correct rear-facing fit, start with harness slot adjustments: verify that your child’s straps come through the seat at or below shoulder level. Most seats offer three to five height positions; raise the harness as your child grows.
Next, check webbing flatness. Twisted straps can lead to uneven force distribution during a crash, so straighten them until they lie flat against your child’s body. Then, tighten the harness until it’s snug—perform the pinch test: if you can grasp a fold of webbing at the shoulder, it is too loose. To tighten, remove slack from the hips and thighs first by pulling the front adjuster strap evenly. Finish by positioning the chest clip at armpit level. A proper fit prevents excessive slack, bunching, or sagging, keeping your child secure in the seat.