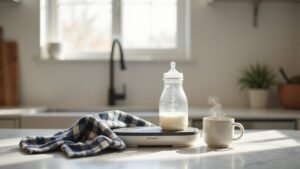
Ever wondered how to warm your baby’s bottle quickly and safely? The Grownsy Bottle Warmer makes it easy to get the perfect temperature in just minutes.
With simple steps like filling the chamber with water and selecting the right mode, you can prepare bottles efficiently and confidently.
Keep reading to learn how to use it all the way from warming to sterilizing.
Distilled Water, a Stable Surface, and Clean Parts: Prep Checklist
To prepare safely, start with distilled or purified water, a flat heat-resistant surface, and thoroughly cleaned parts. Use only distilled or purified water to minimize mineral buildup and prevent scale in the heating chamber. Fill the water only up to the maximum indicated line—overfilling can cause dry burning and damage the warmer. For families on the go, top infant car seats provide comparable portability and safety features. This principle of reducing injury risk is comparable to why a rear-facing position is safer for infants in a vehicle. A chest with eight spacious drawers offers similar organized storage for baby essentials.
Place the unit on a stable, flat surface away from sunlight and other heat sources. Keep the power cord accessible and prevent it from draping over the edge of the counter to avoid accidental tipping or pulling.
Clean all parts before use. Wash the basket and lid with warm, soapy water, rinse well, and dry completely. Wipe the main unit with a damp cloth—never immerse it in water. Assemble the warmer only once all parts are fully dry to maintain hygiene and avoid contamination.
How to Heat Milk Quickly Using Fast-Warm Mode
To heat milk quickly using Fast-Warm mode, place the milk bottle or container into the warmer. Add about 80 ml of purified or distilled water, filling just below the bottle neck for optimal heating. Select Fast-Warm mode, which heats the milk to a gentle 98.6°F (37°C), usually within about 3 minutes for a 4 oz bottle. You will see a countdown timer and hear a beep once the process is complete. Remove the bottle promptly, shake it well, and test the temperature on your wrist to ensure it’s warmed to your preference. Keep in mind that warming times can vary depending on the initial temperature of your milk and the material of the bottle. For added stability during operation, consider safe and sturdy positioning of the warmer on a flat surface. For a similarly perfect fit in your bottle warmer, using a matching cover can help secure the bottle and improve heat transfer. It is also important to follow expert timing guidance to avoid overheating the milk during use. Follow these steps for safe and rapid warming without adjusting the timing.
Match Your Grownsy Warmer’s Time to Bottle Size and Milk Volume
Fast-Warm mode heats milk quickly, but to get consistent results, you need to match the warming time to your bottle size and milk volume. Grownsy’s reference chart provides times for 2, 4, 6, and 8 ounce bottles. For a 4-ounce plastic bottle, the warming time is typically about 3 to 5.5 minutes. Keep in mind that bottle material influences warming speed—glass bottles tend to warm faster than silicone bottles of the same volume. Additionally, initial milk temperature impacts warming time: refrigerated milk at 41°F will take longer to warm than room-temperature milk at 68°F. For example, a 4-ounce plastic bottle at 68°F generally warms in about 3.5 minutes, whereas the same bottle at 41°F may take up to 5.5 minutes. Always pour the recommended 40 mL of distilled water into the chamber before warming. Use the chart as a baseline, but expect final warming times to vary depending on bottle material, volume, and milk temperature. For overall safety, heating formula in a bottle warmer requires monitoring to avoid overheating, which can destroy nutrients or create hot spots. For families who travel frequently, selecting a best travel crib that is lightweight and portable can simplify overnight stays. When on the road, also consider how an infant car seat integrates with your travel gear for seamless transitions.
Remove, Shake, and Test Temperature After Warming
After the warming cycle finishes with a beep, remove the bottle immediately using the anti-scald basket to avoid residual heat from overheating the milk. Do not leave it in the warmer, as delayed removal can cause scorching. Once out, gently shake or swirl the bottle to evenly distribute the heat, preventing hot spots that could burn your baby’s mouth. Next, perform a temperature test by squirting a few drops onto your wrist— it should feel lukewarm, not hot. Always test again before feeding, even if the warmer beeped or switched off automatically, since residual heat may still cause overheating. If the milk is not warm enough after testing, you may reheat it briefly for 0.5 to 1 minute and then recheck the temperature. Remember, the sequence of remove, mix, and test should be followed every time for safe, consistent feeding. Just as a crib’s structural integrity relies on proper material selection, your bottle warmer’s safe performance depends on consistently following this removal and testing routine to prevent overheating hazards. For those building a DIY solution on a budget, selecting high-quality supplies is essential to avoid common safety mistakes. Using a bottle warmer is a common approach, but you should always be aware of the risks from overheating that can destroy nutrients and create hot spots.
Sterilize Bottles and Pacifiers With the Warmer’s Sterilize Mode
To sterilize bottles and pacifiers using the warmer’s sterilize mode, first press the power button. Since the Fast & Sterilize button often serves both functions, select Sterilize to activate the dedicated steam cycle. This cycle uses high-temperature steam to thoroughly sterilize bottles, pacifiers, nipples, and small accessories. Place bottles upside down inside the chamber so steam can reach all surfaces evenly. Before starting, add about 80 to 100 ml of distilled water—using distilled water helps prevent scale buildup and maintains the unit’s performance. The cycle lasts approximately 15 to 20 minutes and displays a countdown timer. After the cycle completes, the unit maintains a constant temperature to keep items sterile until removal. Allow items to cool sufficiently before handling to avoid burns. Be aware that the Anti-Dry Heating feature will turn off the warmer if the water runs out, but regular descaling is still recommended to keep it operating reliably. For best results, always check that the warmer is compatible with Tommee Tippee bottles to ensure a proper fit in the chamber. To ensure baby safety during feeding, look for top high chairs that provide stable seating and easy cleaning for your growing infant. For thorough hygiene, compare steam sterilizer options to confirm this unit meets similar effectiveness standards.
Keep Milk Warm for Hours With the 24H Hold Mode
The 24H Hold Mode allows you to keep milk at a steady 37°C / 98.6°F for up to 24 hours, and the unit’s cushioned feet provide stability during operation. To use it, place the warmer on a flat, heat-resistant surface and fill the water chamber up to the MAX line with distilled water. Insert the bottle into the anti-scald basket, close the lid, and plug in the device. Turn on the warmer, select the 24H mode, and set the desired temperature. The unit will then maintain the milk at a safe, consistent temperature for extended storage. To avoid damaging the warmer, press the release points gently when removing the basket for cleaning. For parents who also value monitoring, choosing a top-rated baby monitor ensures peace of mind during feeding times. Before feeding, shake the bottle well and check the temperature to ensure it’s suitable. Note that this mode isn’t intended for preparing formula; it’s meant for keeping pre-warmed milk at the right temperature. For safety, avoid holding milk beyond the recommended feeding window to prevent spoilage.
Warm Baby Food Safely With the Food Heating Setting
Using the Food Heating setting on your Grownsy bottle warmer is the safest way to warm baby food. You should always heat food in a suitable container or jar, not directly in the chamber. First, add distilled or purified water to the scale line, which helps reduce scale buildup and ease maintenance.
Place the container in the basket, lower it into the warmer, then turn on the appliance. Select the Food Heating function, which typically defaults to 60°C (140°F) on some models but can be adjusted up to 90°C (194°F). Stir the food after heating to prevent hot spots and ensure even temperature distribution. Remove the container promptly once it reaches the desired warmth to avoid residual heat from overheating the food. Remember, this setting warms the food but does not cook it, keeping it safe and nutritious for your baby.
Bottle Not Heating? Fix Water Level, Lid Fit, and Timing
Ensure the water level is correct. Fill the chamber only up to the recommended line, making sure the water sits below the bottle’s neck and doesn’t cause the bottle to float. Using distilled or purified water helps prevent mineral buildup that can interfere with heating. For baby gear hygiene, regularly wipe down the warming chamber to prevent bacterial growth. To keep the bottle clean during outings, always plan ahead by pre-measuring water and carrying a back-up bottle. For thorough cleaning, disassemble all removable parts and wash them separately with mild soap.
Check the placement of the bottle. Place it securely in the anti-scald basket and confirm it’s stable. If the bottle floats, it means there’s too much water. Also, adjust the lid carefully—avoid forcing it if the bottle is too tall, as improper sealing can block proper heating.
Finally, adjust the timing. Larger volumes or colder starting temperatures may require an extra 0.5 to 1 minute of warming. If the bottle remains cold, return it for additional heating. If issues persist, unplug the unit, let it cool for 10 to 15 minutes, then try again.
Milk Too Hot or Too Cold? Adjust Time and Check Starting Temp
To get the milk temperature right, you need to adjust the warming time based on the starting temperature of the milk. Checking that starting point is your first step. For example, refrigerated milk at 41°F requires a longer warming cycle than room-temperature milk at 68°F. Don’t rely on a single default time—your timing will depend on that initial temperature. For a 4 oz plastic bottle, expect about 5.5 minutes from cold, but only 3.5 minutes from room temperature. Always measure the starting temp first to determine the appropriate heating duration.
After the cycle beeps, remove the bottle immediately. If it’s not warm enough, return it for an additional 30 to 60 seconds. Too hot? Allow it to cool before testing again. You can then reduce the next cycle’s time or start with a lower initial temperature. Bear in mind that bottle material makes a difference: glass bottles typically run 2.5 minutes at room temperature, while silicone bottles take about 4 minutes for warming. Shake the milk gently, then test on your wrist to ensure it reaches roughly 98.6°F before feeding.