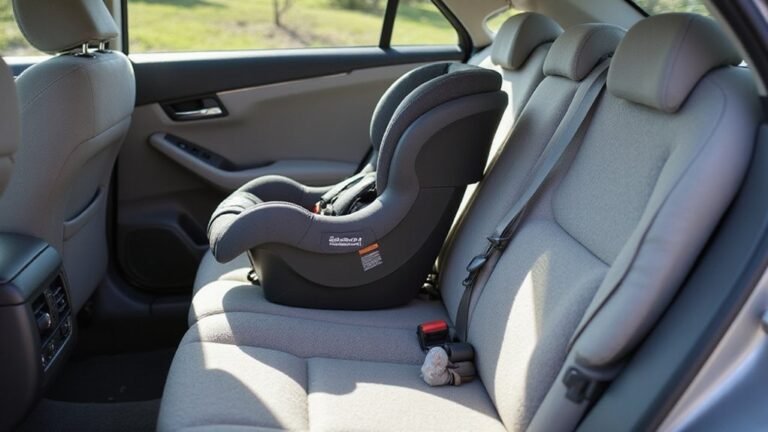
Choosing the right time to install your infant car seat can feel tricky, especially with a new baby on the way. The best window is usually around 35 to 37 weeks of pregnancy, giving you a few weeks before your due date to set everything up and get it inspected professionally.
Getting it done early means you’re prepared if your baby arrives early and ensures the safest rear-facing spot in the car.
Keep reading to learn exactly how to time your installation perfectly.
Why Early Installation Saves You Last-Minute Stress
Installing your infant car seat early is crucial because labor can be unpredictable. By setting it up in advance, you avoid last-minute scrambling during delivery or discharge. This preparation helps you prevent the panic of searching for missing parts or trying to decipher confusing manual instructions in a stressful situation. Early installation also gives you time to check your car’s compatibility—ensuring the seat base locks securely with your vehicle’s seat belts or LATCH system and doesn’t shift more than an inch. Performing routine maintenance checks, such as inspecting harness straps for twists, adjusting the recline angle according to the manual, and tightening the base after a few practice runs, further enhances safety. Getting these details sorted out beforehand can reduce injury risk by up to 82 percent and guarantees your seat is ready for those unpredictable moments when you’re discharged from the hospital. Taking the time now to install the seat calmly leads to a safer and less stressful first ride home. Before you secure the base, run a safety check to confirm the harness clip sits at armpit level and the chest strap is snug. When choosing your car seat, you can apply similar diligence by researching key features like portability and weight to compare with other nursery items such as travel cribs. For additional nursery product insights, you might also review a guide on top rail covers designed to protect crib surfaces from teething damage.
Best Week to Install a Car Seat
The best week to install a car seat is between 35 and 37 weeks of pregnancy. Installing within this window provides about three weeks before your due date, giving you enough time to make adjustments or have a professional check the installation. Doing it too early risks needing a replacement if your baby arrives early, especially since accidents before birth can happen. Avoid waiting until delivery week, as a rushed setup might occur if your baby arrives sooner than expected. Confirm that the seat does not shift more than one inch at the belt path for proper safety. Place it in the second-row center seat, which offers the best protection in most vehicles. This timing strikes a balance between readiness and flexibility, helping you avoid common myths that say earlier installation is always better. It is also vital to follow safe sleep practices by never allowing a baby to sleep in the car seat outside of the vehicle. For added safety, experts recommend keeping your child rear-facing as long as possible due to superior head and neck protection. For older children, it is also important to know when to stop using a booster seat based on age, weight, and height guidelines.
What the Guidelines Say About 35–37 Weeks
If you’re installing your car seat around 35 to 37 weeks, you’re aligning with a key medical guideline. The American Academy of Pediatrics recommends that babies born before 37 weeks undergo a car seat tolerance screening. This screening checks for apnea, bradycardia, or oxygen desaturation before discharge. Because these infants often have immature breathing control, hospitals follow strict protocols to monitor them effectively. Checking your car seat’s expiration date is also important, as using an expired seat can compromise safety during the screening and beyond. Additionally, the middle car seat position is often considered the safest for properly installed infant seats, as it provides the greatest distance from side-impact collisions. Choosing the right crib sheet size ensures a snug fit that prevents any loose fabric from interfering with the car seat’s harness system.
During the screening, your baby is observed for 90 minutes in a semi-reclined position. This helps identify any signs of instability that could indicate a need for additional medical attention. If the baby fails the test, more observation may be required before you’re cleared to leave. Installing the car seat before birth is a proactive step, but remember, it’s part of your discharge readiness, not just travel preparation.
Make sure the harness straps sit at or below your baby’s shoulders for a secure fit. Avoid bulky coats during installation, as they can interfere with the harness’s effectiveness. Proper setup ensures safety both during hospital discharge and future travel.
How to Build a Safety Buffer Before Your Due Date
Starting your infant car seat installation about four weeks before your due date creates a strong safety buffer. This window provides ample time for fit checks, learning how to install correctly, and practicing securing the seat in your vehicle. It also allows for troubleshooting any issues that come up, such as incompatible seat belts or mechanical adjustments, before labor begins. Reading the manuals thoroughly and verifying that the seat doesn’t shift more than an inch ensures proper fit. Confirm seat belt compatibility in all vehicles you plan to use—don’t rely solely on LATCH. Scheduling a certified passenger safety technician inspection can help identify hidden errors, especially if you’ll install the seat in multiple cars. For families who will later need to transition to a booster, understanding the Graco conversion setup process now can prevent future installation mistakes. Many parents also review the best Graco crib mattresses to ensure the nursery sleep environment matches the car seat’s safety standards. Additionally, reading car seat cover reviews can help you find a perfect fit that protects the seat fabric and maintains a safe, snug installation.
This early timing also safeguards travel safety if your baby arrives early or unexpectedly. Babies rarely deliver exactly on the due date, so starting early keeps you prepared without last-minute rushes. Place the seat in the back seat, away from airbags, and double-check for recalls or expiration dates. Being proactive about the installation process means you stay calm, prepared, and ready for the ride home whenever your baby arrives.
What If Baby Arrives Before You Install the Car Seat?
If your baby arrives before you’ve installed the car seat, you’ll still need a properly installed, rear-facing seat before leaving the hospital. Don’t panic, but do act quickly. Take advantage of any extra hospital days to ensure the seat is secure.
First, confirm the seat’s base is tightly secured with the safety belt or LATCH system. Check for zero wiggle at the belt path to ensure a stable fit. This confirms a tight fit that prevents dangerous movement during travel. Next, verify that the seat is level, usually with a built-in indicator, to keep your baby’s airway open. Remember, you’ll likely need to do this curbside, so bring your manuals along. A Pack ‘n Play bassinet can provide a safe temporary sleep space if you need extra time to focus on the seat installation. Look for a car seat that balances quality, performance, and value to ensure you get the best protection for your newborn.
If your baby arrived early, have a partner or friend retrieve the car seat from your vehicle and practice installing it beforehand. Double-check that the harness straps are positioned at or below your baby’s shoulders, the chest clip is at armpit level, and the harness is snug enough that you can’t pinch any excess webbing. A rushed installation can be risky, so take your time to verify every click and stability point before your first ride home.
Can You Install the Car Seat at the Hospital?
You typically cannot install the car seat at the hospital yourself, but some facilities may allow you to verify or visualize its installation. Hospitals often prefer that you handle the actual installation using tutorials provided by the manufacturer and your vehicle manual. Staff are generally not trained to install car seats but can check that your seat’s accessories—such as harness components and expiration date—are in order. They may also confirm that the seat is rear-facing, which is safest for infants. If your baby is preterm or has a low birth weight, you might need to undergo a car seat test in the nursery using your own seat. To avoid surprises during discharge, prepare ahead of time by practicing the installation before your due date, and call the hospital in advance to clarify their policies.
How to Install the Car Seat Correctly (Step-by-Step)
To install the car seat correctly, start by gathering both the car seat and vehicle manuals since their instructions are vital for a safe setup. Review each manual carefully to understand model-specific installation tips, especially regarding the belt path and recline angle.
Place the base on the vehicle seat and adjust the recline to between 30 and 45 degrees using the built-in angle indicator. Ensure the base sits flat and stable before proceeding. Route the vehicle’s seat belt or LATCH system through the correct belt path, making sure there are no twists along the route. When tightening the belt, press firmly on the base while pulling the strap to remove slack. Perform the inch test by trying to wiggle the base at the belt path—if it moves more than one inch, re-tighten the belt until it feels secure. Always use either seat belt or lower anchor connectors, not both, during installation. Similar care is needed to avoid over-pumping which can strain your body and reduce milk supply. For maximum safety, the infant car seat should always be placed in the back seat of the vehicle. The Doona car seat base is a popular all-in-one option that combines safety and convenience for easy transitions.
After securing the base, position your infant in the seat. Adjust the shoulder straps so they are at or just below shoulder level. Tighten the harness until it is snug enough that you cannot pinch any excess webbing at the strap. Always double-check that each step is secure and the harness is properly fitted before driving.
Where to Place the Car Seat: Back Seat, Rear-Facing, and Why
The safest place for your infant’s car seat is the back seat, specifically installed in a rear-facing position. Always put it there rather than the front seat to reduce the risk of injury from airbags, which are designed for adults and can be deadly to a small child in a rear-facing seat. Keep your child rear-facing as long as possible—until they exceed the seat’s height or weight limit—to maximize safety. For added hygiene on the go, best breast pump wipes can quickly clean the car seat harness buckles and straps between deep washes. For a clean sleeping environment at home, a best crib skirt can help protect the mattress and storage area.
When installing the seat, aim for the center of the back seat if your vehicle allows a secure fit. This position is up to 43% safer than side rear seats for children under age three because it is farther from side-impact zones. However, do not compromise on installation quality for the sake of location. The seat must be tightly secured—moving no more than one inch at the belt or latch path. If a tight fit isn’t possible in the center, choose an outboard position on the back seat. Always follow your car seat and vehicle manuals for proper installation guidelines.
Key Fit Checks Before Your Baby’s First Ride
After securing your infant car seat in the back seat, perform these essential fit checks before each ride. First, ensure your baby’s weight is between 4 and 22 pounds and their height is under 30 inches, matching the seat’s size range. Verify that your baby’s head remains at least one inch below the top of the restraint to prevent overextension.
Next, adjust the harness straps to be at or below your baby’s shoulders for rear-facing placement. The straps should lay flat without twists. Tighten the harness until you can’t pinch any slack at the shoulder—this is the pinch test. Before adjusting, remove the child from the carrier to access and properly rethread the straps through the correct harness slot for a secure fit. Position the chest clip at armpit level, avoiding it riding near the neck or abdomen. Lastly, confirm the seat’s recline angle using the built-in indicator to keep your baby’s head from falling forward. Always double-check all these points before every trip.
How to Get a Free Car Seat Inspection
To get a free car seat inspection, start with Safe Kids coalitions, which host over 8,000 events nationwide. Use the National CPS Certification Program search tool to find certified technicians near you or check NHTSA’s inspection station directory. Your state health department, fire department, or hospital likely offers free, appointment-based checks as well. Additionally, look for events at public safety fairs and AAA locations.
Call the organization ahead of time to confirm language options or support for special needs. Schedule your appointment early because slots fill quickly. During the inspection, a certified technician will assess your seat’s fit, ensure proper installation, and teach you how to maintain the car seat correctly. This service might also qualify you for insurance discounts, so ask your provider. Relying on trusted resources for a professional check ensures your child’s safety, rather than depending on informal advice.