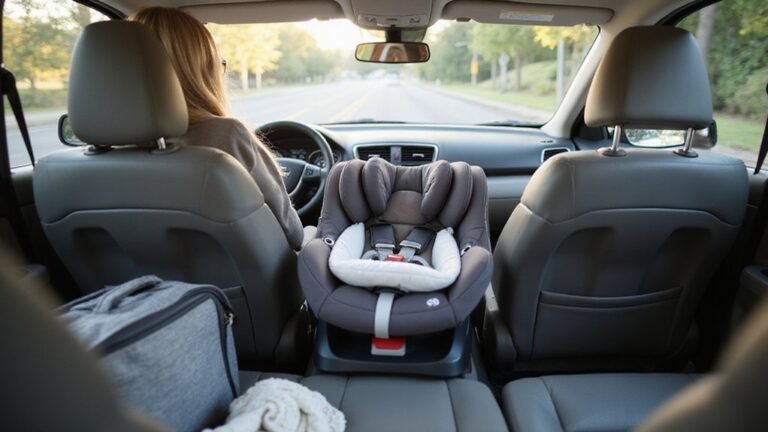
Wondering where to place your infant car seat? The safest spot is always in the back seat, facing backward. This position minimizes risks from airbags and crash impacts, keeping your baby protected.
Knowing how to properly secure the seat is key to ensuring your little one’s safety.
Keep reading for easy tips to get it just right.
Why the Back Seat Is Always the Right Choice for an Infant Car Seat
Placing your infant car seat in the back seat is the safest choice because front airbags can deploy with enough force to cause serious injury or death to a baby. Many regions’ child seat regulations require children under 13 to ride in the rear for this reason. The back seat provides a safer distance from the most common and severe impact—frontal collisions. It also keeps your baby far from front airbags, which are designed for adult bodies and can be dangerously forceful. Rear-facing car seats in the back seat significantly decrease the risk of head and neck injuries during a crash. Just as a safe sleep environment is essential for a crib, the back seat is the designated safe zone for your infant in the car. For a car seat cover that fits securely, reviews highlight the importance of proper installation to maintain safety. Overall, choosing the back seat is the simplest and most effective way to enhance your infant’s safety in a vehicle.
Is the Middle Seat the Safest Spot for an Infant Car Seat?
The middle seat is often the safest spot for an infant car seat because it provides the greatest distance from side impacts. Placing your baby in the center seat reduces the risk of injury by about 43% compared to outboard seats on either side. This is because the middle position is farthest from potential points of side collision, offering a natural safety buffer during crashes that impact the vehicle’s sides, where door-side seating is most vulnerable. However, this advantage only applies if the car seat is installed correctly. Not all vehicles or seating positions are suitable for a center installation. Check whether your vehicle’s middle seat has accessible lower anchors and a flat, secure surface. If the seat has a hump or the anchors are unusable, securing the car seat properly becomes difficult or impossible. In such cases, a well-installed seat on the side may be safer than a loosely fitted one in the middle. Always refer to your car seat manual and vehicle owner’s manual to ensure a correct and secure installation. For rear-facing installations, it is critical to understand that the rear-facing orientation provides superior protection for a child’s head, neck, and spine in a crash. Similarly, when using a bottle warmer, parents should follow the safety guidance for heating baby formula to avoid hot spots and ensure proper temperature. For a peaceful sleep setup, some parents also seek a Sealy mattress for cribs that offers firm, supportive comfort.
When Should You Place the Infant Car Seat on a Side?
Placing the infant car seat on the passenger side is generally advisable for practical reasons. If you often park on the street, the passenger side allows you to load your child from the curb, minimizing their exposure to passing traffic. This placement can add an extra layer of safety during drop-offs and pickups. However, the most crucial factor is proper installation. A securely installed seat on any side always outweighs a poorly installed seat in the ideal position. Focus on ensuring the seat is tightly secured and correctly positioned, regardless of which side you choose.
Why You Should Never Put a Rear-Facing Seat in the Front
Placing a rear-facing car seat in the front passenger seat is extremely dangerous and should never be done. The primary safety issue involves the deployment of the front airbag. When a frontal airbag activates, it does so with explosive force designed to protect adult occupants. However, if a rear-facing seat is positioned in front of it, this force is directed straight into the back of the seat where your baby’s head rests. This impact can cause severe head or neck injuries, often fatal. Because of their fragile neck bones and developing bodies, infants are especially vulnerable to the force of airbags. Rear-facing seats placed in the front increase the risk of death or serious injury by five times compared to the back seat. To ensure maximum safety, always install your child’s rear-facing seat in the back, far from the danger zone of the airbag. To further protect your child, choose a model with a 5-point harness for optimal safety and crash protection. If you are crafting a DIY changing pad cover on a budget, remember that proper fabric cutting is key to avoiding costly mistakes. For additional storage convenience, you might also consider a chest of drawers to keep baby essentials organized.
How to Get a Rock-Solid Infant Car Seat Installation
To achieve a rock-solid infant car seat installation, start by placing the base in the back seat. Follow both your car seat manual and your vehicle owner’s manual for model-specific routing and locking instructions. Use the correct belt path, which is specified on the seat, and choose either the vehicle seat belt or LATCH system—never combine them unless your manual explicitly states it is safe to do so. Always practice with a doll before initial use to familiarize yourself with the components and securing process. When you need to remove the seat from the base, locate the release points to avoid damaging the parts. Ensure that the seat belt or LATCH is locked tightly to maintain a secure installation.
Press down firmly on the base while tightening, using your body weight to eliminate all slack. Check the movement at the belt path; the base should not shift more than 1 inch side-to-side or front-to-back—that’s the inch test for child safety. If the base moves more, uninstall it and start the process over. Adjust the recline angle using the built-in indicator until it matches the recommended position for your baby’s age and size before final tightening. Ensure the base’s stability features are engaged to prevent any rocking that could compromise the tight fit.
Finally, position the harness so it sits at or just below your infant’s shoulders. Proper installation and harness placement ensure compliance with safety regulations and provide the best protection for your child.
How to Adjust the Harness for a Rear-Facing Infant
To adjust the harness for a rear-facing infant correctly, start by ensuring the shoulder straps come through the seat slots at or just below your baby’s shoulders. This positioning helps prevent the straps from exiting above the shoulder line, which is unsafe. If the straps are not at the correct level, rethread them through the same set of slots that are at or below your baby’s shoulders. If your pack ‘n play feels stuck during setup, check the folding mechanism for obstructions or ensure the sides are fully lifted into the locked position.
Next, check the harness for a snug fit. Before tightening, make sure your child’s back and bottom are flat against the seat. Pull the harness until it feels firm—there should be no slack visible. Perform the pinch test at the collarbone area: try pinching the webbing. If you can pinch any extra strap, it’s too loose. Tighten the harness until pinching is no longer possible. Once secure, position the chest clip at armpit level. This placement helps keep your baby deep in the seat, reducing sliding and ensuring proper protection. Always verify that the harness straps are routed through matching slots on both the padding and shell for consistent safety. Before reinstalling the seat, confirm that any removable infant inserts are used only according to the manufacturer’s weight and height limits, as improper use can affect harness fit. Some parents use a SlumberPod to create a dark, quiet sleep environment for their baby during travel, which can help maintain a consistent sleep schedule.