If you’re wondering how to warm your baby’s milk safely and quickly, a bottle warmer can be a real lifesaver.
The Philips Avent Bottle Warmer is designed to make the process simple, from adding water to checking the right temperature before feeding.
With just a few easy steps, you can have warm milk ready in no time.
This guide will walk you through the entire process to help you get the most out of your warmer.
Keep reading to learn how to set it up, operate it efficiently, and care for it properly.
Setting Up Your Philips Avent Bottle Warmer for First Use
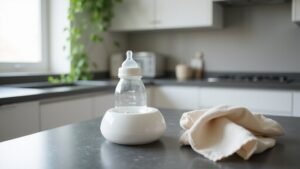
To set up your Philips Avent bottle warmer for first use, start by unboxing and inspecting it thoroughly. Make sure the basket, lid, and power cord are all included and check for any visible damage. Before proceeding, read your specific model’s manual to understand any unique setup steps. Place the warmer on a flat, stable surface close to an outlet, ensuring it sits level so the bottle remains centered. Fully assemble the bottle and add room-temperature drinking water into the warming chamber before plugging it in. Do not connect the power until you have added water and positioned the bottle properly. For even heating, position the bottle in the center of the warmer. Ensuring a perfect fit for the bottle inside the warmer prevents uneven temperature spots. Philips Avent recommends using only their design for optimal compatibility with the heating element. For general best practices, always refer to essential safety tips for using baby bottle warmers correctly.
Select the appropriate setting that matches your milk volume, then press the power button. The indicator ring will light up to confirm the warmer is active. Once the warming cycle completes, carefully remove the bottle and test the milk’s temperature on your wrist. Regular maintenance involves wiping the exterior after each use and descaling the unit monthly to keep it functioning efficiently. Keep the troubleshooting guidelines handy—if the warmer isn’t heating, double-check that it’s plugged in correctly and that there is enough water in the chamber.
How Much Water to Add to Your Bottle Warmer for Different Bottle Sizes
To add the correct amount of water to your Philips Avent bottle warmer, match the water level to your bottle size and milk volume. For a small 125 ml bottle, add 125 ml of water. For bottles holding 1 to 3 ounces, use 1 ounce of water. For medium 4 to 6 ounces bottles, fill with 2 ounces of water. For large 7 to 8 ounces bottles, you’ll need 4 ounces of water. The key rule is that your water level should equal your milk volume. Be careful not to let water rise above the bottle neck or spill over the warmer’s edge. For bottles over 210 ml, fill to about 1 centimeter below the rim. Always use fresh, room-temperature water, and never add warm water to the warmer. Remember, the water amount should be based on milk volume, not just the bottle shape. This careful heating method helps maintain milk safety, similar to how rear-facing car seats significantly reduce injury risk for infants. For consistent results, consider the quality and value of your warmer to ensure safe heating every time. Choosing a warmer with a consistent heating profile is as important as selecting a newborn swing that provides comfortable and safe motion.
Choosing the Right Setting on Your Bottle Warmer for Milk or Food
Choosing the right setting on your Philips Avent bottle warmer depends on whether you’re warming milk or food, as each has its own mode. For milk, you should match the setting to the volume and starting temperature. Measure your milk first, then select the corresponding number: smaller volumes like 30–90 ml require a lower setting, while larger quantities up to 330 ml need a higher one. The starting temperature also affects warming time—room-temperature milk warms faster than refrigerated milk, so you might need to adjust the setting accordingly. Glass bottles typically require a lower setting than plastic ones, and milk stored in bags should only be warmed using the keep warm or defrost mode. For warming food, select the dedicated food setting to ensure proper heating without overdoing it. Regular cleaning of the warming chamber prevents residue buildup that can affect performance.
How to Start the Warming Cycle and Read the Progress Lights
To start the warming cycle on your Philips Avent bottle warmer, first place the bottle inside and add fresh room-temperature drinking water up to the milk level or about 1 cm below the rim for larger volumes. Choose the appropriate volume setting, then press the on/off button. On IQ models, hold the start button until it beeps. The progress lights will then flash gradually, indicating the cycle is in progress. It is important not to remove the bottle during this time; the lights are not a temperature indicator but serve as safety precautions, warning you that the unit is hot. Temperature regulation is automatic, so there is no need to adjust anything—simply watch the lights to monitor the process. On standard models, the indicator will light up continuously when warming is complete. On IQ models, an intermittent beeping sound combined with flashing lights lasting about 30 seconds signals that the cycle has finished and you can proceed. For a sturdy, safe result, always ensure the warmer is placed on a flat, heat-resistant surface away from loose fabric. For additional safety, consider using a sturdy crib rail cover to protect surfaces from heat damage. Like choosing a chest of drawers with multiple storage compartments, selecting a warmer with the right capacity helps organize your feeding routine efficiently.
How to Know When the Milk Is Ready and Test the Temperature
Once the entire progress indicator lights up continuously and stops flashing, your milk is ready. Do not remove the bottle while the indicator is still flashing, as that means heating is still ongoing. Some models emit an intermittent beep for 30 seconds at the end of the process, confirming completion. Safety is key: always swirl or shake the bottle after heating to distribute the heat evenly and eliminate hot spots. Then, test a few drops on the inside of your wrist. If it feels too hot, let it cool down. If it’s not warm enough, you can return it to the warmer for a maximum of 30 extra seconds. Never rely solely on the indicator; your wrist test is the final safety check. Remember, do not leave the milk in the warmer past the readiness point, as the temperature can continue to rise. The device uses water bath technology to circulate milk continuously for even heating. For consistent results, always choose a travel system that matches your baby’s feeding routine. Experts advise that newborns should never sleep in a swing due to suffocation and positional risks, so always transfer your baby to a flat, safe sleep surface after feeding. To avoid bacterial growth, follow the safe storage guidelines for any unused breast milk after warming.
Cleaning and Drying Your Bottle Warmer After Each Use
After each use, unplug your Philips Avent bottle warmer and allow it to cool completely before cleaning. Empty any remaining water by pouring it sideways, making sure not to pour directly onto the knob or plug to prevent moisture buildup. Use a soft, damp cloth to wipe the interior and exterior surfaces; avoid soaking the unit or using soap, bleach, or abrasive cleaners, as these can damage the material. While the warmer’s plastic is durable, it does not match the Greenguard Gold certified safety standards found in top-rated crib mattresses. For traveling parents, choosing a lightweight stroller that is easy to carry and store is equally important for a smooth trip. Avoid common beginner mistakes like overfilling the warmer, which can lead to uneven heating.
Check carefully for spilled baby food or other debris at the bottom of the warmer, gently removing any buildup with a soft cloth or sponge. These cleaning steps help ensure your warmer stays safe and in good working condition. After cleaning, let the warmer air dry fully—do not reassemble or use it while moisture remains inside. Keeping it dry prevents residue accumulation and promotes efficient operation.
To maintain optimal performance, descale the warmer every two to four weeks using white vinegar or citric acid, especially if you have hard water. Be sure to follow a monthly descaling procedure by allowing the solution to sit for 30 minutes to effectively dissolve mineral buildup. Using pre-boiled water during use can also reduce limescale formation, helping your warmer function smoothly over time.