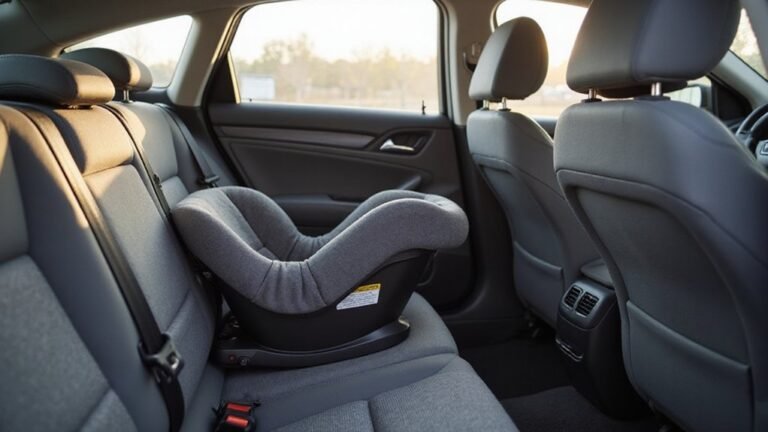


Wondering how to properly install a rear-facing car seat? The key is ensuring it’s secure and positioned correctly to keep your little one safe.
You’ll need to choose between using the seat belt or the LATCH system. Make sure the seat is installed tightly with the right recline angle.
Keep reading, and you’ll get the full step-by-step that makes installation straightforward.
Check Your Vehicle and Seat Before You Start
Before installing your vehicle seat, confirm it has not been involved in a crash and that the printed expiration date hasn’t passed. Check for visible damage and ensure all parts are present and secure. Never install the seat in front of an active airbag; always place it in the back seat for safety. For an infant seat, make sure its base is level and correctly positioned between the lower anchors if you are using them. Verify that your seat supports rear-facing installation in that specific vehicle spot, as rules and compatibility can vary. Always follow the manual instructions to ensure proper setup and maximum safety. Confirm your vehicle has the metal bar for the lower anchors to hook onto for a secure fit. Additionally, a snug installation should leave no more than one inch of movement at the belt path, which is easier to achieve when you pair your seat with a cover designed for a perfect fit that doesn’t interfere with harness adjustments or buckle access. Choosing a firm, supportive surface for your baby’s sleep environment is critical, and for the nursery you can also explore safe crib mattress options that meet federal safety standards. For extended rear-facing use, consider models that are highly rated for longevity and overall performance.
Should You Use the Seat Belt or LATCH Anchors?
You can choose either the seat belt or the LATCH system to install a rear-facing car seat, and both are equally safe when used correctly. You typically do not use them together unless both manuals specifically say it’s okay. LATCH often makes installation easier, especially when the belt path is difficult to access, but it has a weight limit, usually around 65 pounds combined for the child and seat. Once you reach that weight, switching to the seat belt is necessary. A helpful analogy is that choosing between these methods is similar to selecting the right umbrella stroller for your child’s age, as both options depend on your specific needs and equipment capabilities. When considering the best fit for your vehicle, the ideal chair rail height can also influence how easily you access the lower anchors for installation. For parents seeking added convenience, features like a simple height adjustment found in top-rated high chairs can make mealtime transitions smoother.
Your choice might also depend on the vehicle’s features. If your car lacks lower anchors or if the seat belt is easier to tighten with less movement, these factors can guide your decision. The type of harness does not influence whether you use LATCH or the seat belt, but tools like a rolled towel or pool noodle can help achieve a tighter, more secure fit. Ultimately, the best method is the one that provides the most secure and stable installation for your child’s safety.
Install Rear Facing With the Seat Belt
To install your rear-facing seat with the seat belt, start by reading both the child seat and vehicle owner manuals since the locking method varies by product and car. Place the seat in the back seat, then thread the seat belt through the rear-facing belt path, making sure there are no twists in the belt. Buckle the seat belt securely. For convertible car seats, follow specific installation techniques by routing the lap-shoulder belt under any pads or guides as instructed. To ensure the child fits correctly, verify the seat suits child’s height, weight, and age before proceeding. It is also important to understand when to stop using a booster seat for older children. A secure base requires checking that all mounting hardware remains tight and free from corrosion, just as you would inspect any anchoring system for wear.
Lock the belt by pulling it all the way out and then letting it retract, or use the seat’s lock-off if your seat has one. While tightening, press your weight into the seat to ensure a snug fit. Check for movement at the belt path; the seat should not shift more than 1 inch side to side or front to back. Verify that the recline angle matches the indicator on the seat to ensure proper positioning. When the seat feels stable and secure, the installation is complete.
Install Rear Facing Using LATCH Anchors
To install a rear-facing car seat using LATCH anchors, follow these steps precisely. First, locate the lower anchors in the seat bight—the area where the seat back and bottom cushion meet. Your vehicle’s owner’s manual provides their exact position and any specific weight limits. Proper placement is critical for safety. Remove the lower anchor connectors from their storage or clip and route the strap through the rear-facing belt path of the car seat. Attach each connector to its corresponding anchor bar, ensuring the hook securely goes over the anchor and the strap lays flat without twists. Correctly installed car seats are only 25% of the time, so careful attention to each step is vital. Understanding how a chest of drawers compares to a dresser can help you choose safer furniture storage for your nursery. For added comfort, consider pairing your installation with one of the top head supports for extended rear-facing travel.
Listen for a click sound—some models give an audible reminder that the connection is secure—but always visually confirm each connection to ensure it is properly engaged. Gently pull on each strap and connector to verify they do not come loose. To tighten the installation, apply firm downward pressure on the car seat while pulling the strap to remove slack. Keep tightening until the seat cannot move more than one inch side-to-side or front-to-back at the belt path. Recheck that the seat base sits flat against the vehicle seat and that all straps remain untwisted. For optimal safety, also consider expert timing guidance when planning the car seat transition for your child.
Set the Correct Recline Angle for Your Child’s Age
To set the correct recline angle for your child’s age, start by securing the car seat with LATCH. For newborns with limited head control, position the seat at approximately 45 degrees from vertical to keep their airway open and support their head properly. As your child gains better head and neck control, usually around 3 months, gradually adjust the seat to a more upright angle, close to 30 degrees. Always verify the recline indicator on your seat; a seat set too upright can cause your child’s head to slump forward, risking airway obstruction, while an overly reclined position may increase ejection risk during a crash. Use the manufacturer’s markings, typically divided into zones based on weight, such as the newborn zone for infants under 3 months and the older zone for older babies, adjusting accordingly for your child’s development. This is because rear-facing seats distribute crash forces evenly across the back and head, reducing stress on the neck and spinal cord.