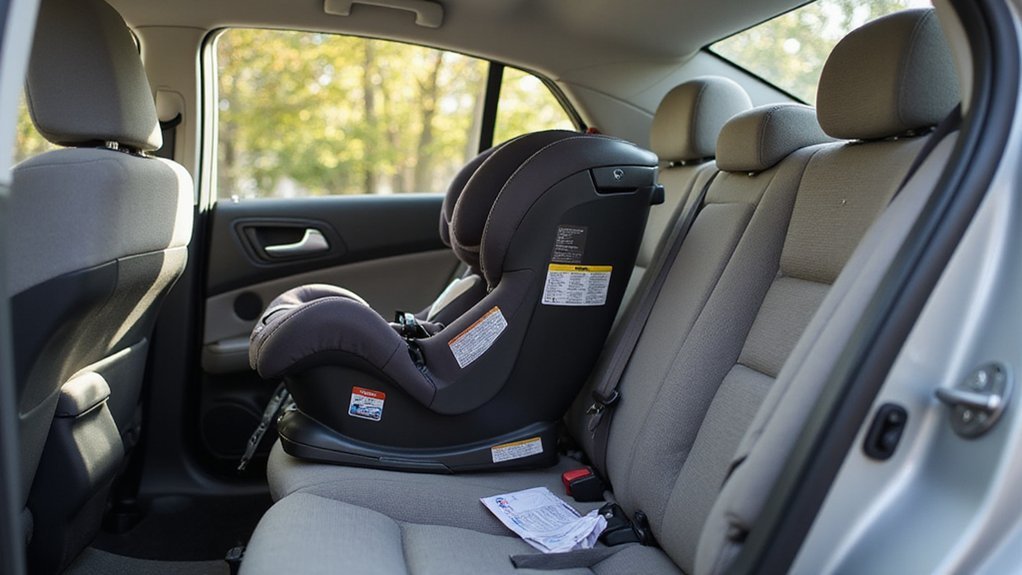
If you’re trying to install a Graco infant car seat and want to do it correctly, you might wonder where to start.
Getting the base securely in place is key to ensuring your child’s safety during every ride.
By understanding how to properly position and tighten the base, along with securing the harness and locking mechanisms, you’ll be able to confidently install your child’s car seat.
The following walk-through will guide you through each step for a safe, proper setup.
Start Here: Prep Your Car and Check the Level Indicator
To ensure proper maintenance and safety, start by keeping the base flat against the seat, pushing it back until it touches the seat back. At least 80 percent of the base should be resting on the vehicle seat to provide stability. Before tightening, select the correct recline position to accommodate your child’s size and comfort. After installation, common installation mistakes to avoid include leaving too much slack in the belt. Test the car seat for no more than one inch of movement at the belt path; if it moves more than that, adjust the installation until you achieve a firm fit. A secure, firm installation indicates that you are ready for safe travel. The vehicle must be parked on a level surface for accurate restraint angle. For long-term durability, it is wise to protect the vehicle seat with a high-quality seat cover that resists wear and stains. Choosing a cover with a sturdy, wipeable finish can also simplify cleanup, just as a dresser’s material affects its lifespan and maintenance over years of daily use.
Where to Position the Base on the Rear Seat for Maximum Stability
Position the base centered between the lower LATCH anchors in the rear seat for maximum stability. Always check your vehicle owner’s manual first, as the center position is only suitable if approved and the anchor spacing is at least 11 inches. If the spacing is less or the position isn’t approved, select an outboard rear seat that is compatible. Push the base flat against the seat back until at least 80% of it contacts the vehicle seat, avoiding siting it on a seat belt buckle or uneven cushion. Ensuring the base is stable and level provides a solid foundation, helping it stay secure and preventing movement later. The base includes an anti-rebound bar that enhances safety by preventing lift during accidents. For additional stability, ensure the base is placed on a firm, level surface similar to what a chest of drawers requires for balanced storage. Rear-facing seats distribute crash forces more evenly across the child’s head, neck, and spine, which is why this orientation is recommended for as long as possible. For older children transitioning to a booster, choosing a model with energy-absorbing foam improves crash protection and overall comfort.
How to Install the Graco Base With LATCH or ISOFIX
To install the Graco base with LATCH or ISOFIX, start by removing the lower anchor connectors from storage and extending the LATCH strap to its maximum length. Place the base flat on the vehicle seat, pushing it back until the front touches the seat back. Ensure at least 80 percent of the base is on the seat for stability. Attach the connectors to the lower anchors until they click into place, indicating secure attachment. Route the LATCH strap through the rear-facing belt path, keeping it flat and free of twists. Some bases may require routing under the SnugLock bar, so follow the specific instructions for your model. Ensure the vehicle is on level ground before beginning installation for accurate base positioning. For additional comfort during nursing, you can apply Aquaphor as nipple cream to soothe dry or cracked skin. A common error to avoid is not rechecking the tight fit after you have attached both connectors, as the base may loosen. If the strap feels stuck or resists pulling, gently tug on the fabric to release any twisted or bunched material that can mimic a tension issue.
Next, use the built-in level indicator to adjust the recline of the base. For a newborn, you may need to increase the recline to ensure proper harnessing. To tighten the strap, press down firmly on the center of the base and pull the strap tight. Check the installation by gently trying to move the base; it should shift less than one inch. Finally, verify that the connectors are secure and that the seat fabric isn’t caught in the strap, preventing a proper fit.
How to Install the Graco Base Using a Seat Belt
To install the Graco base using a seat belt, start by verifying your vehicle’s belt locking method, as this affects the installation process. Place the base on a rear seat, pressing it firmly against the seat back for stability. Route the lap and shoulder belts through the designated rear-facing belt path on the base, making sure the belts lie flat without twists. Ensure the vehicle is on level ground to maintain stability and proper base alignment. For vehicles with a switchable retractor, pull the shoulder belt all the way out until you hear a clicking sound, which indicates it has locked. While pressing down on the center of the base, pull the belt to remove slack, ensuring a snug fit. If your vehicle’s seat belt system requires it, use a locking clip as specified in your manual. Check that the base can only move no more than 1 inch at the belt path to confirm a secure installation. Reinspect the level indicator—achieving the correct angle is essential for your child’s safety. Keep in mind that prolonged exposure to sunlight can weaken the base’s material, so park in shaded areas when possible. Properly installing the base also ensures that the child harness within the carrier can be adjusted correctly and safely. To maintain overall hygiene, you should also periodically clean the base using a mild detergent and avoid harsh chemicals that could damage the material. For parents using a double stroller, compatibility with multiple car seat models is a key factor in ensuring both seats fit securely. You should also note that experts recommend transitioning out of a booster seat only when the child meets specific age, weight, and height requirements to ensure safety.
Checking the Harness Fit and Chest Clip Position Before Attaching the Carrier
To ensure a proper fit, buckle the harness tongues until you hear a click. Before tightening the straps, verify that the harness lies flat against the body and is not twisted. Pull the adjustment strap to remove any slack; the harness should be snug without causing discomfort. Perform a pinch test at the shoulder—if you can pinch any webbing, tighten the straps further. The chest clip should be centered at armpit level, keeping the shoulder straps correctly positioned across the torso. Move the handle to the sitting position before securing the child, as this prevents interference with the harness and ensures a secure fit. Many lightweight newborn car seats are designed to be under 10 pounds for easier portability. For added convenience, you can later store the car seat in a dresser with multiple drawers for organized baby gear storage. To maintain your child’s comfort on longer trips, consider the seat padding and recline features found in top-rated booster seats. Once these adjustments are correct and the chest clip is properly aligned, you are ready to proceed.
Lock the Infant Carrier Into the Base Correctly
To lock the infant carrier into the base correctly, start by aligning the locking bar on the front of the carrier with the base locks. Carefully set the carrier straight down, keeping it centered to ensure the lock engages evenly. Avoid forcing it at an angle, as this prevents proper latching and compromises safety. Child safety depends on precise alignment. Additionally, confirm the level indicator on the base falls within the acceptable zone after locking the carrier. A fabric that promotes safe sleep can also support restful breathing while the carrier is secured. For mothers managing milk production, choosing a pump with effective suction strength can help establish a reliable feeding routine. To avoid common installation mistakes, always check that the base is not twisted or loose before locking the carrier in place.
Once aligned, press down firmly on the front of the carrier and handle until you hear a distinct click. That sound confirms the lock has fully engaged. If you do not hear the click, reposition the carrier and press again until you do.
After hearing the click, perform a pull-up check on the front corners of the carrier. The carrier must stay latched; if it lifts out, the lock did not engage properly. Ensure the carrier sits flush with the base’s locking area before releasing pressure. If it feels loose or tilted, reinstall until it fits securely. Only use the seat once this locking process is complete and secure.
Testing Your Graco Infant Seat’s Stability (The 1-Inch Rule)
After locking the carrier into the base, use the 1-inch rule to check stability. Grip the base at the belt path, where the vehicle belt or LATCH strap passes through, not the top of the seat. Apply a firm handshake force and push the base side to side and front to back. The movement should stay under 1 inch (2.5 cm). Moving more than this indicates the installation isn’t tight enough. Check your belt routing and ensure the seat recline angle matches your model’s manual. Re-tension the belt or strap and test again. Do not skip this step; Graco requires it every trip. If the seat still moves more than an inch after adjustments, try another approved seating position. Before testing stability, ensure the base rests on a clean changing pad cover to protect against spills while you install. When evaluating your nursery setup, a stable seat pairs well with a crib set with dresser that meets high quality standards. This ensures secure attachment at the belt path, preventing excessive movement during travel.
5 Mistakes That Make Your Graco Infant Seat Unsafe (And How to Fix Them)
To ensure your Graco infant seat is safe, avoid these five common installation mistakes. First, a loose base can compromise safety. To fix this, press firmly at the belt path and retighten until the seat cannot move more than one inch side to side. Second, never use both LATCH and the seat belt at the same time; choose one secure method to prevent conflicting attachment. Third, an incorrect recline angle may block your baby’s airway. Adjust the seat until the level indicator is fully within the blue zone for proper positioning. Fourth, harness misuse is frequent: straps should come from at or below the shoulders, be snug enough to avoid pinching, and the chest clip should sit at armpit level. Lastly, always keep the seat rear-facing in the back seat until your child reaches the height or weight limit. Avoid inexpensive accessories that might interfere with installation, as they can compromise safety during travel. Following these steps helps keep your little one secure on every ride.