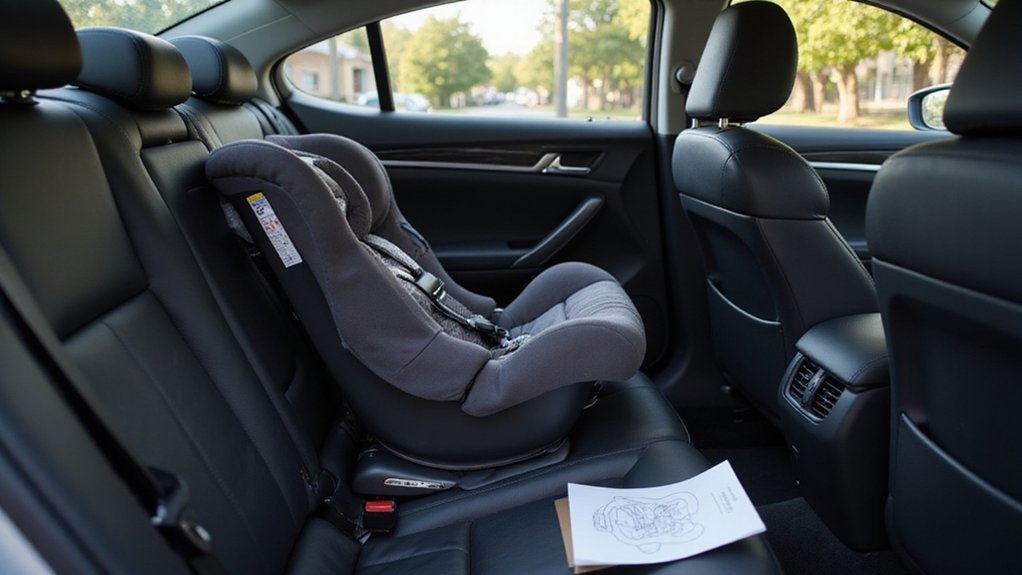
Wondering how to securely install an infant car seat? Getting it right is crucial for your baby’s safety, and it usually involves understanding your car and seat manuals.
Choosing the correct installation method and ensuring the seat is snug and properly reclined are also important steps.
By the end of this, you’ll be able to confidently install your infant car seat the right way. Keep reading for all the essential steps.
Read Both Manuals Before Installing an Infant Car Seat
You need to read both the car seat manual and your vehicle owner’s manual before opening the box. This step is crucial for a safe installation. Since manufacturer instructions vary, your seat’s specific rules won’t be the same as others’. The vehicle owner’s manual tells you approved seating positions and where to find lower anchors. It also explains seat belt locking mechanisms, which differ from car to car.
Matching the seat to your vehicle helps prevent installation errors. Check the weight and height limits listed in both manuals before you begin. You’ll also learn the correct belt path and whether to use LATCH or a seat belt. Reading these manuals early saves you time during installation and helps avoid mistakes that could impact your child’s safety and comfort. Keep both manuals close each time you reinstall the seat. Similarly, when choosing a baby’s sleep surface, reviewing top rated crib mattresses can guide you toward models that offer the best quality, performance, and safety for your child. For the bassinet, a best fitted sheet ensures a snug and safe mattress cover that meets safety guidelines. To further ensure your baby’s comfort, you can also research the best swing that provides soothing motion for newborns.
Find the Right Back Seat Spot for a Rear-Facing Infant Seat Base
If the center spot won’t allow a tight fit due to seat contours or belt geometry, avoid forcing it. Instead, move the infant seat base to either rear side seat. A secure installation on a side spot is always better than a loose fit in the center. Test your chosen position by pushing the base at the belt path; it should not shift more than 1 inch in any direction. Prioritize the location that offers the tightest fit, correct angle for your infant, and ease of daily use, ensuring you avoid the front-seat dangers entirely. This positioning reduces the risk of injury to the neck and spine in a crash. For added comfort and safety around the nursery, consider best crib skirts reviewed for a perfect fit. Similarly, when selecting a sleep surface for your baby, always look for a firm mattress that meets current safety standards.
Choose Between Seat Belt and LATCH Installation
LATCH limitations become clear once you reach the combined weight limit or when using a center seat without dedicated anchors. While LATCH installation often feels simpler and quicker, it’s not suitable for every seating position or stage of your child’s growth. Always prioritize the quality and security of your installation over the method used. Use LATCH only when your child’s weight is within the specified limit and the anchors are easily accessible. If those conditions aren’t met, opt for the seat belt installation instead. Never attempt to combine both methods for the same seat base, as this can compromise safety and stability. Choosing a car seat cover that offers a perfect fit can also improve overall installation security by preventing base slippage. Similarly, selecting a fitted sheet designed specifically for a Graco Pack ‘n Play can prevent the mattress from shifting during use. Transitioning to a seat belt installation is similar to knowing when to stop using a booster seat, as both require careful attention to weight and age guidelines.
Install With the Seat Belt: Route, Lock, and Tighten
Route the seat belt through the proper belt path listed in your car seat manual. Make sure the webbing stays flat and free of twists as you thread it through. Buckle the belt completely, then activate the vehicle’s locking mode to lock the belt mechanism—this ensures it won’t loosen during travel. Press down firmly on the seat base using your body weight to compress the cushion and stabilize the seat. Grasp the lap portion of the belt and pull it horizontally across the belt path to gain leverage; then gently feed any excess slack back into the retractor. Tighten the belt from the belt path, avoiding pulling on the shoulder belt for better stability. This method prevents excessive sideways tilt, which compromises stability and safety. Finally, check for movement at the belt path—there should be no more than one inch of shift. Remember, handle the tether attachment separately; focus on obtaining a snug, locked seat belt installation for a secure foundation. For Graco models, always locate the release points on the base before removing or adjusting the seat to avoid damaging the latch mechanism.
Install With LATCH Anchors: Click, Pull, and Press
Locate the lower anchors, which are typically marked with a small child-seat icon where the seat cushion meets the seatback. Position the car-seat base on the designated spot and attach each connector to its matching anchor. Not all vehicles have lower anchors, so verify your vehicle’s LATCH compatibility first, as vehicles made after September 2002 must have LATCH in at least two seating positions. Each connector should click into its own anchor with an audible snap, confirming proper engagement. Ensure the straps lie flat and are untwisted for a secure fit. To maintain the connectors in good condition, regularly clean them with a damp cloth to prevent buildup that could interfere with the latch. For similar care of baby items, bottle warmers are also safe for gently heating breast milk without damaging nutrients. When selecting a base, always prioritize a model that meets current federal safety standards, as 5-point harness systems provide the most reliable crash protection for infants.
Pull the free end of the lower-anchor straps to tighten and remove all slack from the system. Keep the base aligned during this process. Then, press down firmly on the base, using your body weight to compress the vehicle cushion. This step ensures a snug and stable fit. To check for proper installation, attempt to move the base side to side or front to back. It should not move more than one inch in either direction. If it does, repeat the attachment and tightening steps until the base is securely installed.
Set the Recline Angle After Tightening the Base
Use the base’s recline foot, knob, or adjustor to set the angle. Turning the adjuster one way makes the seat more reclined; turning it the opposite way makes it more upright. Always refer to your manual, as hardware can vary between models. For newborns, choose the most reclined position within the seat’s range to support their head and neck. Older infants with better head control can sit more upright. If the manual permits, you can use approved aids like a tightly rolled towel to fine-tune the recline, but never override manufacturer guidelines. Before finalizing, check the recline indicator to ensure the ball is in the green zone for proper safety. Remember that transitioning to a booster seat depends on key milestones like height, weight, and maturity, but for now focus on correct installation. The seat’s firm surface is critical for safety, similar to how a Graco crib mattress provides essential support for sleeping infants. For safe bottle feeding, you can warm breast milk using a bottle warmer following the manufacturer’s directions rather than a microwave.
Perform the Inch Test: Confirm Less Than 1 Inch of Movement
Perform the inch test to confirm your car seat is truly secure. First, grasp the seat firmly at the belt path—not the top, armrests, or cup holders. Push it side-to-side and front-to-back. The goal is to have less than 1 inch of movement in any direction. If the seat shifts more than that, your installation is too loose. This process is similar to confirming a secure assembly before reversing a disassembly. For children who have outgrown their infant seat, transitioning to a booster seat ensures continued safety as they grow. A stroller fan can help keep your child comfortable during warm weather outings.
Don’t forget to retighten each time you make an adjustment. Apply your body weight into the seat while pulling the LATCH strap or seat belt tight. After tightening, retest using the same method. Continue this cycle until the movement remains under 1 inch at the belt path. A snug installation verified by the inch test ensures the seat won’t shift dangerously during a drive or crash. Always perform this check before buckling your baby in. Properly positioning hands on the base of the seat where the belt is located helps maintain a firm grip and avoid false results during testing.
Buckle Your Baby Right: Harness, Chest Clip, and Pinch Test
Tighten the harness until it’s snug, ensuring there is no slack. Perform the pinch test by trying to pinch the webbing at your child’s collarbone or shoulder. If you can pinch any webbing, it’s too loose. If you cannot pinch any webbing, the harness is securely fitted. Remember to recheck the fit each time you buckle your child in, as movement and slack can develop during a ride. Properly buckled harnesses are essential for keeping your child safe and secure during transportation. Confirm that the shoulder straps are at or below the baby’s shoulders for a correct fit. For a coordinated nursery setup, you may also consider top crib sets that complement your car seat safety routine.