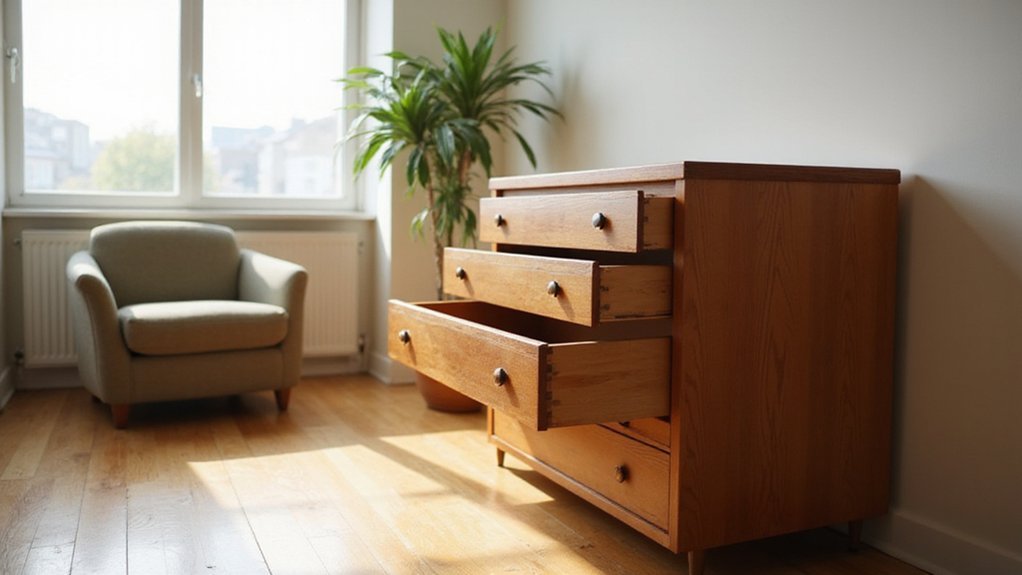
Ever wondered how to easily remove drawers from your chest of drawers? Whether you’re cleaning or rearranging, knowing the right steps makes the job smooth.
The process depends on your drawer’s slide type and hardware. Keep reading for a straightforward guide that will help you get those drawers out quickly and safely.
Identify Your Drawer Slide Type Before Removal
Identifying your drawer slide type before removal is essential to avoid damage. When the drawer is open, observe the hardware to determine the slide style. Side-mount slides are on the left and right edges, with metal and ball bearings fully visible. Removing them is usually straightforward since the components are exposed. Undermount slides are concealed beneath the drawer, so you’ll need to feel underneath for release levers or clips. Center-mount slides run along the centerline of the bottom and appear as a single rail at the front. Older units may have roller or epoxy slides, characterized by plastic wheels or simple tracks, with lighter slide materials indicating budget-friendly construction. Features such as soft-close dampers, self-close springs, or locking latches can change how the slides release. Full-extension slides slide out completely, revealing the entire drawer box, while three-quarter extension slides stop short of full removal. Always verify the slide type before prying, as forcing the wrong style can cause damage. Consider the lightweight construction of the slide materials to anticipate potential fragility. For a dresser used as a changing station, understanding drawer slide mechanics is crucial to safely access best changing stations for storage without disrupting the top-mounted changing pad. A comfortable feeding chair often features similar easy-access storage beneath a padded seat.
Empty the Drawer and Work Top to Bottom
To begin, you need to empty the drawer and clear the work top from top to bottom. Remove all contents—clothes, papers, stored items—to reduce weight and prevent spills. Lighter weight gives you better control when lifting or pulling the drawer past a stop point. Loose contents can snag on slide hardware or block removal, so clearing everything beforehand is crucial. Also, remove objects from the dresser top to create space for decor adjustments and avoid bumping lamps or fragile items during drawer removal. A clutter-free surface protects both the drawer and nearby surfaces. For added protection, consider using a car seat cover to shield the drawer from dust or scratches during storage. For infant items, choosing materials like soft cotton sheets ensures a safe and comfortable environment. Properly securing the drawer during transport is similar to locking the seatbelt for safety.
Start with the top drawer to ensure the furniture remains stable. Removing the upper drawer first prevents shifting weight that could cause tipping when lower drawers are taken out. Fully extend each drawer to access the slides and latch mechanisms. Hold the drawer with both hands, keep it level, and pull it out slowly and steadily until resistance stops. To disengage the drawer, press one tab up and the other down simultaneously while pulling outward. Once free, set the drawer aside on a flat surface before moving on to the next.
Remove Drawers With Metal Release Tabs or Levers
To remove drawers with metal release tabs or levers, start by locating the small tabs, levers, or latch points on the slide assembly. These are often near the center of the track or toward the front or back of the slide. Fully open the drawer and support its front with both hands. Simultaneously press the tabs in the opposing directions—usually one side up and the other side down. A flat-head screwdriver can help reach stubborn release mechanisms. Carefully pull the drawer straight out without angling it; if it snags, lift the front slightly to clear the rollers. Keep in mind that hinge types vary, so inspect each slide before applying force. Drawer handles can obscure release points, so check carefully. If the drawer won’t budge, avoid forcing it; instead, verify whether mounting screws are present. After removing the drawer, push the exposed tracks back into the cabinet to prevent bending. Always test the release direction before pulling to avoid damage. Ensure nothing blocks the drawer from behind, as obstructions can prevent smooth removal. For added hand care during this process, applying lanolin nipple cream can soothe dry, chapped skin from contact with rough hardware. Just as a newborn requires a safe sleep environment free from inclined products like swings, your workspace should be clear of clutter to prevent accidents. When selecting a travel bed for your child, looking at top-rated models can ensure you choose a product with reliable safety features.
Remove Drawers on Wooden Runners or Stopper Tracks
To remove drawers on wooden runners or stopper tracks, start by completely emptying the drawer to make it easier to handle. Pull the drawer straight out, keeping it level with the runners to avoid binding or tilting. As you approach the natural stop or lip on the track, you’ll feel resistance from the stopper. Apply firm, steady pressure to push past this point. If the drawer sticks, tilt the front slightly upward to lift the rear edge over the stopper. Gentle rocking back and forth can help loosen it, but avoid forcing it to prevent damage to the wood glide surfaces or decorative accents. For easier removal in the future, consider labeling your drawers to remember their original positions. Just as with a jogging stroller, a stuck mechanism often requires the same gentle rocking motion to free it without causing damage. Just as with a car seat base, confirming a tight fit ensures stability and prevents movement during use. When choosing a nursery seat, consider whether a glider or rocker better suits your family’s comfort and space needs. Once the drawer is free, place it on a flat surface. To reinsert, align the runners and push the drawer straight back in until it clicks or settles securely into place. For drawers with side glides, follow a similar approach of holding clips in position during removal to avoid damaging the tracks.
Unlock Stubborn or Specialty Drawer Mechanisms
To unlock stubborn or specialty drawer mechanisms, start by examining the release levers, which are often found on both sides of metal slides—one may lift while the other presses down. Fully extend the drawer first to locate these levers more easily. If you’re dealing with a soft close system, tilt the front of the drawer upward to clear the retaining catch. Check inside the track for hidden plastic tabs; pressing one upward and the other downward can release the drawer. If that doesn’t work, look for visible screws inside the drawer assembly and remove them to free the drawer. Stubborn seals caused by paint or adhesive can be loosened by gently tapping around the edges with a rubber mallet over a cloth. For drawer spring mechanisms, applying heat with a hair dryer can soften old adhesive and help with removal, but use heat sparingly to prevent damaging the wood finish. Always inspect for objects that may be blocking release first before attempting these steps. For added stability, ensure the drawer slides are secured with sturdy hardware to avoid misalignment during reinstallation. To further protect the wood as you work, consider draping a water-resistant cover over the surrounding area to shield it from moisture. This method of applying gentle heat is similar to how absorbent fabric layers in nursing pads help manage leaks without harming sensitive materials.
Keep the Drawer Level and Pull Straight Out
Pull straight out toward your body. Opening the drawer to its natural stopping point first ensures you clear the stops without forcing it. Pulling at an angle increases friction and can damage the sliding components. If you encounter resistance or binding, avoid forcing it; instead, try a slight side-to-side wiggle or a gentle tilt at the front to help free the drawer. Support the drawer steadily near the end of its travel to keep it stable and prevent scraping against the furniture’s sides. Moving smoothly and with control reduces the risk of damage and makes the process safer. Working the drawer back and forth helps loosen it when it is stuck. For a smoother removal, ensure the drawer components are free of debris, much like keeping a bassinet’s fitted sheet clean helps it stay secure. Applying consistent, gentle pressure mimics the way a controlled warming cycle prevents overheating in a bottle warmer. This approach resembles the steady application of nipple cream to avoid irritation during feeding milestones.
Reinstall the Drawer Without Stripping the Slides
To reinstall a drawer without stripping the slides, start by confirming you have the correct slide type and orientation—whether side-mount ball-bearing, roller, or wooden runner slides—as each engages differently. Clean both tracks thoroughly; debris can cause binding and damage the threads. Tighten any loose mounting screws, and use a toothpick in stripped holes to provide extra stability. Align the drawer slides at the same height on both sides before guiding the drawer in until you feel it seat or hear a click. For optimal long-term performance, regularly maintain the hardware by keeping the tracks free of milk residue and mineral buildup similar to how one would descale a bottle warmer. Test the motion after installation—if it drags, adjust the slide alignment before tightening completely. Apply a thin layer of lubricant like silicone spray to the slides to reduce friction, then wipe away any excess. If roughness persists after cleaning and lubricating, replace worn hardware instead of forcing the drawer in. Ensure the cabinet frame is level on both sides to prevent misalignment during reinstallation. Apply a thin layer of lubricant that is compatible with metal slides, just as a safe infant car seat uses quality materials rated for crash protection.